
Stop the Tug: Quick Fixes for Clippers That Pull
Learn safe fixes to STOP clippers from pulling hair. Follow six easy steps—cleaning, lubrication, blade care, motor checks, and test cuts—to restore smooth, painless clipping for pros and home groomers.
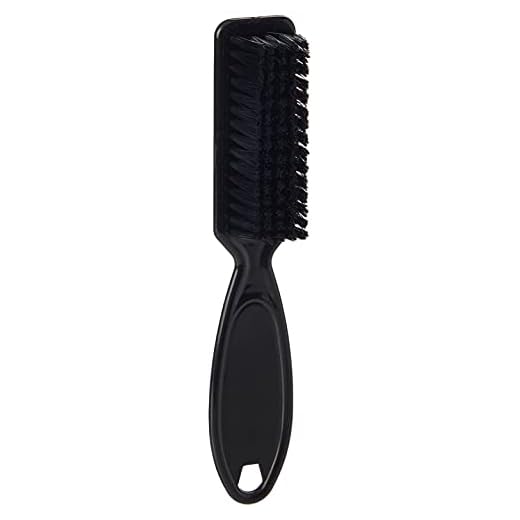
What You'll Need

Fixing a Wahl Clipper That Snags Hair: Quick, Easy Tips
Safety Check & Initial Inspection
Before you tinker, discover the one quick routine that fixes most tugging—no mechanic required.Unplug the clippers and remove the blade assembly. Safety first: power off and disconnect to avoid injury.
Use a small brush or compressed air to remove trapped hairs between blades and inside vents. Work in a well-lit area so you can spot tiny nicks or rust.
Perform these quick checks:
This basic visual and tactile inspection often reveals the simple causes of pulling and sets up the next maintenance steps. Don’t skip this step—it saves time and money.

Deep Clean & Proper Lubrication
Lubrication is boring but magical—one oil drop can stop the pain. Seriously.Remove the blades per the manufacturer instructions. Use a small brush to free embedded hairs and compressed air for stubborn debris.
Soak removable blades briefly in warm, soapy water if the manual allows (e.g., 5–10 minutes), then dry completely. Wipe old oil and gunk away with a clean cloth before reassembly.
Apply a few drops of clipper oil along the blade teeth and where the stationary and moving blades meet. Run the clippers for 5–10 seconds to distribute oil evenly. Avoid over-oiling—excess oil attracts dust and becomes sticky.
Clean and oil after several uses, then test on a small hair patch and re-adjust as needed.
Check Blade Alignment & Tension
Is alignment the secret sauce? Fix this and your clipper stops eating hair.Inspect the blades visually and by feel. Misaligned or loose blades cause pulling even when clean and oiled.
Ensure the stationary and moving blades sit flush—no gaps or overlapping edges. Tighten attachment screws so they are snug but not over‑tightened; follow manufacturer torque if given.
Test blade tension with the clippers off: move the top blade by hand. The blade should glide smoothly with slight resistance—no wobble or stiffness. If teeth don’t interlock correctly, loosen the screws slightly, nudge the blades into position, then retighten.
Replace bent or worn blades—alignment fixes won’t help damaged teeth. For adjustable‑tension clippers set tension to medium, then fine‑tune while cutting. For example, if the clipper drags at the nape, slightly increase tension and retest.
If unsure, consult the manual, manufacturer support, or a local technician.

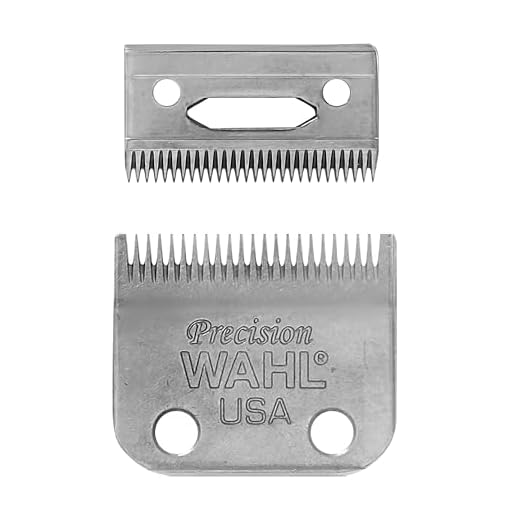
Sharpen or Replace Blades
Dull blades are sneaky—sharpen or swap to feel instant improvement.Inspect blades for rounded teeth, micro‑chips, or rust. If hair slides instead of cutting, the edge is dull—especially on coarse hair.
Replace blades with manufacturer‑matching models. Avoid cheap generics that often cut poorly. For example, swap to an OEM blade set designed for your clipper model.
Sharpen blades only if your clippers support it. Hone edges with a fine stone or file using steady, even strokes. Consider a professional sharpening service to restore factory edge geometry if you’re unsure.
When installing new or sharpened blades, ensure they mate perfectly with the moving blade and test on a comb or a small hair sample. Also check for blade compatibility with your clipper model and the correct blade guard. Store spare blades dry and oiled to prevent rust.
Inspect Motor & Drive Mechanism
When the motor's weak, cleaning won't help—learn how to spot internal failures.Inspect the motor and drive after cleaning and blade checks. Open the housing following the manufacturer’s instructions and look carefully for internal wear or damage.
Check the following:
Test under load by clipping a small patch of hair or running the clipper over a towel; listen for stuttering, grinding, or excessive heat. If torque is low, gears are damaged, or wiring/frayed cords are present, replace parts or consult a service—DIY motor rebuilds are rarely practical.

Test Cuts & Fine-Tune
Test like a pro: small cuts reveal big problems—save time by testing first.Reassemble the clipper carefully, power it on, and run it briefly off hair to confirm smooth operation.
Use a comb and a small section of hair (or a foam testing pad) and make sample cuts at several guard lengths to evaluate real-world performance.
Watch for these issues:
Adjust the blade gap slightly with the tension screw—smaller gaps cut closer but can pinch; widen the gap if you feel tugging.
Test each speed setting; try lower speeds on fine or wet hair to reduce pull.
Keep notes of which adjustments helped; if pulling persists, document symptoms (photos or video help) and seek manufacturer support or a trusted repair shop.
Rotate guards regularly to even blade wear and run these test cuts every few maintenance cycles.

Keep Clippers Happy and Hair Pain-Free
Follow these six steps for quick fixes that stop pulling—clean, lubricate, align, and care for blades. Try them, share your results, and keep clipping painless; save time, money, frustration too.


This guide is great for beginners. One tip I’d add: keep a small notebook with maintenance dates — when you cleaned, lubricated, replaced blades. Helps you spot patterns over months.
I use notes on my phone for that. Never forget when I last oiled.
That’s a smart, low-tech solution. Thanks for sharing — patterns can reveal if a clipper is failing prematurely.
This guide would’ve saved me a sweaty trip to a repair shop last month. Two quick additions I’d love: recommended lubricant types (brand examples) and a short video on tension adjustment. Visuals for fiddly stuff = lifesaver.
Videos are clutch for mechanical tweaks. Reading about ‘feeling tension’ does not translate well for me 😂
Agreed — a 1-min clip could prevent a lot of guesswork.
Great ideas — I’ll add recommended oil types and consider a short demo video for tension adjustments. Thanks for the suggestions!
Okay serious question: how often should I be lubricating? The guide says ‘proper lubrication’ but doesn’t give a schedule. My clippers are used weekly for a toddler. Any recs?
If you’re trimming more than once/week, definitely oil every time. Kids’ hair + crumbs = quick build-up.
I do it every time I use mine. Takes 10 sec and prevents most tug issues — less downtime for repairs.
Also wipe off excess oil after you run them — too much oil attracts lint. Learned the hard way 😅
For weekly use on a toddler I’d suggest oiling before each use or at least every other use. A drop or two along the blade teeth and a quick run for a few secs spreads it evenly.
Funny thing — my clippers tugged only on one side of my head. Turns out a guard was warped and didn’t sit right. Replaced the guard and smooth sailing. Guard condition matters too!
I never thought of guards causing tug. Replaced mine last month and noticed a big improvement.
Good callout — guards can cause uneven tension and tugging. Glad replacing it solved your problem.
Question: after cleaning and oiling, I still had a slight pull. Turned out the drive tension was a tad loose (step 3). Tightened per the guide and it’s back to buttery. If you hear a slight chatter, that might be your cue.
How do you measure tension? I just eyeball it and pray 🙈
I used a tiny feel test — if the blade can move slightly but springs back firmly, it’s good. Not scientific but works.
Chatter is often tension or loose blades. Glad tightening helped. Did you notice any speed change after adjustment?
Yeah, same here. Tension too tight = overheats; too loose = tug. There’s a sweet spot.
Love the title — ‘Keep Clippers Happy and Hair Pain-Free’ 😂 Made me smile. Also, if anyone’s dealing with stubborn rust on blades: a little vinegar soak followed by thorough drying helped me. But be careful and test first.
Glad the title landed! Vinegar can work but as you said, dry thoroughly and re-lubricate. Rust can mess with blade alignment too.
If you soak too long you might pit the metal. Short soak + brush is safer.
Oof rust. I use a rust eraser and then re-sharpen if needed. Vinegar sounds more accessible though.
Tried the blade alignment trick in step 3. Took me longer than expected but it made a huge difference. My only gripe: the photos in the guide could use arrows showing what ‘flush’ means. Otherwise solid.
Thanks for the feedback — noted on the visuals. Glad alignment fixed it. If you want, tell me your clipper model and I can give a more specific tip.
Yep, ‘flush’ confused me too at first. I ended up using a piece of paper beside the blade to check evenness — worked ok.
Short and sweet: Step 4 (sharpen or replace) SAVED me. I tried sharpening once with a DIY jig — not perfect but good enough. But if you’re not confident, just buy new blades.
DIY sharpening is intimidating. Where did you get a jig? Amazon?
Good point — sharpening is cost-effective but takes skill. If you do sharpen, test on a small patch and make incremental passes.
Small nitpick: step 5 mentions inspecting the motor and drive mechanism but doesn’t list common symptoms of motor failure (like overheating or unusual smells). Could be useful to add a short checklist.
Yes! I ignored a strange smell and later found the motor brushes were worn. A checklist would’ve saved me time.
Great suggestion — adding a symptoms checklist is helpful. I’ll update the guide to include overheating, burning smell, loss of power, and unusual noise as red flags.
Long post because I want to be thorough:
I had this issue for months. Tried cheap fixes, upgraded blades, got frustrated. Followed steps 1-5 slowly and here’s what actually worked for me:
1) Safety check — unplug and remove guards.
2) Deep clean — used isopropyl on a cloth then brush.
3) Alignment — one blade was slightly crooked.
4) Replaced blades with a mid-range set — night and day.
5) Motor seemed fine after I cleaned the drive coupling.
Now it’s smooth. If you’re on the fence about replacing blades, try all cleaning steps first.
Thanks for the detailed walkthrough — super helpful for others reading. Replacing blades after cleaning is often the final fix.
Which blade brand did you go with? I’m tempted to replace but want a solid, durable set.
I appreciate the step list. Replacing blades is expensive but sometimes worth it — glad you got it sorted.
Thanks for writing this out. The motor/drive cleaning tip is something I never thought to check.
I went with a mid-tier ceramic set — lasted well so far and less tugging than the old stainless ones.
I love that the guide included a ‘safety check’ first. Found a small screw nearly falling out on my old clipper — could’ve been bad. Also, a lil PSA: unplug before trying alignment 😬
Had a screw fly off once. Spent 20 minutes crawling under the couch. The struggle is real lol.
Yep, lose screws = chaos. Keep a small magnetic tray when you’re doing maintenance.
Totally — safety first. Good catch on the screw. If it’s stripped, consider replacing the screw before reattaching the blade.
Tried the ‘test cuts & fine-tune’ step after everything else. Two passes and a tiny blade adjustment and it’s smooth. Also, don’t be shy — small adjustments make big differences.
Towel test = genius lol
Exactly — fine-tuning is where the magic happens. Patience pays off.
Anyone else do test cuts on an old towel first? 😂 saves a bad hair day.
Agreed. I always do a short test on the back of my neck before committing to a full cut.
Finally — a guide that doesn’t just tell me to ‘buy new blades.’ Stopped my clippers from tugging after step 2 and 3. Quick note: I used a canned air duster for the deep clean and it blasted out a weird clump of hair and lint. Felt gross but also triumphant 😂
Haha same — the lint monster lives in my clippers. I usually follow with a microfiber to wipe things down before oiling.
Pro tip: use a small brush from an old toothbrush to dislodge stubborn bits before the canned air — keeps the air can from just moving the mess around.
Nice! Canned air can be a game-changer for getting into the gaps. Glad step 2 helped — did you oil right after cleaning?