Why a Clean-Cut Mustache Matters
Want a mustache that looks sharp without fuss? This guide shows beginners how to use scissors and an electric trimmer together to get a clean, natural result. A well-groomed mustache improves appearance, keeps hair out of your mouth, and boosts confidence. You’ll learn safe prep, simple shaping, and easy techniques that save time.
Expect the whole routine to take about 10–20 minutes once you know the steps, and plan light maintenance every 3–7 days depending on growth. We’ll cover matching shapes to faces, scissors for texture and detail, trimmer settings for clean edges, and how to combine both for a precise finish. Troubleshooting and upkeep tips will help you keep results consistent and stress-free. You’ll build steady, confident skills over time.


Trim Your Mustache at Home: Pro Tips for a Flawless Look
Tools, Prep, and Safety: What You Need Before You Start
Essential tools
Gathering the right gear makes the difference between a ragged attempt and a clean-cut result. At minimum you’ll want:
Optional but useful:
Prep: cleaning, drying, and combing
Start with a clean mustache. Wash with warm water and a mild cleanser or beard shampoo to remove oils and food. Pat dry—sopping wet hair hides its true length, while slightly damp hair is easiest to control. Comb downward and outward along the natural growth to reveal split ends and directional swirls. Tip: comb small sections and hold the hair taut between finger and comb for accurate snips.
Workspace setup
Choose bright, even lighting (daylight bulbs or a lamp at face level). Stand over a towel or wear an apron to reduce cleanup. Use a second mirror or handheld mirror to inspect angles; magnification helps with symmetry. A stool or chair at eye level keeps posture steady for precision work.
Safety basics & hygiene
Hold scissors like a pencil for control—thumb in the small ring, index and middle finger supporting—make tiny snips instead of large cuts. Grip the trimmer like a pen, with the guard in place, and move slowly. Electrical precautions: use dry hands, avoid standing water, and unplug before blade cleaning. Clean blades and combs after every use—brush out hair, then wipe with a cloth and 70% isopropyl alcohol. Oil blades per manufacturer recommendations.
Start conservative
When in doubt, trim less. Begin with a longer guard or make small scissor snips; you can always shorten further. These simple preparations set you up to match shape to face and growth—next we’ll explore how to read your mustache’s natural pattern and choose the right shape.
Know Your Mustache: Shape, Growth Pattern, and Face Compatibility
Understand growth direction and density
Hairs don’t all point the same way. Run a fine-tooth comb downward, upward, and outward to see the dominant growth direction and any cowlicks. Density matters: a dense mustache can be thinned slightly for shape, while sparse areas require length or a defined edge to look intentional. Practical tip: press the comb against the skin—if you can see scalp easily, treat that area as “sparse” when planning length.
Identify common mustache patterns
Recognizing your pattern informs technique. Common types:
Match shape to face and nose
Choose target length/shape to complement features:
Nose size matters: a prominent nose pairs better with a narrower, well-trimmed mustache; a small nose can support fuller styles.
Symmetry vs. natural asymmetry
Prioritize functional symmetry—keep the center over the philtrum aligned with the bottom lip. Perfect mirroring suits formal looks; casual styles can embrace slight asymmetry (many barbers call it “character”). When in doubt, aim for balanced visual weight, not pixel-perfect halves.
Read growth before your first trim
Let your mustache grow for 3–5 days, then map cowlicks, direction, and fastest-growing zones. Photograph it straight-on and in profile; use those images to mark where to shorten, blend, or leave length for texture and mobility.
Scissors Technique: Precision Trimming for Natural Texture
Setup and grip
Start with dry hair—moisture hides true length. Sit with good light and a magnifying mirror if you have one. Use small, sharp scissors (curved tips help follow the lip line). Grip: thumb in the smaller ring, index or middle finger in the larger ring, and rest your ring finger on the shank for stability. Keep your other hand as the guide—comb hairs down and hold them lightly between finger and thumb.
Step-by-step: shape, then texture
Finger & comb technique
Use the comb as a visual ruler: lay it against the lip or across the mustache where you want length. Hold hair between comb and fingers; scissors should slice just above the fingers. For thinning, lift small subsections up and make short vertical cuts along the length.
Safety, symmetry, and quick fixes
Inspect both sides frequently—mirror flip or take a photo. Remove only visible stray nostril hairs with rounded-tip scissors; never go deep. If you overcut, soften the edge with more point cutting or let it grow a few days and blend. Practice slow, small cuts—most corrections come from restraint, not speed.
Next, we’ll pair these scissor habits with trimmer moves so you can get fast, consistent edges without losing the texture you just created.
Trimmer Technique: Speed, Consistency, and Clean Lines
Start by thinking big-to-small: the trimmer is for setting length, cleaning seams, and handling bulk quickly. Use it after your scissors work so you don’t lose the textured finish you created.
Choosing guard lengths and doing a test pass
Pick a longer guard to remove bulk (e.g., 4–6 mm), then step down for refinement. Always do a single, slow test pass on an inconspicuous area to confirm length before you commit.

Hold flat versus on edge — how positioning changes the cut
Work with hair growth, not against it
Trim with the grain for bulk removal, then against or across the grain for a closer, cleaner finish along the lip line. For stubborn cowlicks, use short, controlled strokes and finish with scissors if texture disappears.
Workflow — bulk first, refine next
Defining edges, blending, and neckline
Fine-detail tips and avoiding mistakes
Next up: combining these trimmer moves with scissor finesse so your mustache looks both sharp and naturally textured.
Combining Scissors and Trimmer: A Step-by-Step Routine for a Clean-Cut Finish
Quick workflow (approx. times)
Start with a clear order — it saves time and keeps mistakes reversible.
This routine takes ~20–30 minutes the first few times; once familiar, you can do a tidy-up in 5–10 minutes.

Step-by-step details
- Wash, dry, comb: Dry hair holds shape. Comb straight down over the lip, toward the nose, and outward at the corners to reveal natural fall.
- Trimmer bulk pass: With a longer guard, sweep horizontally to set density. Keep strokes light and consistent; stop if you see an area you like and move to scissors.
- Scissors for shaping: Use point-cutting to soften the top edge — snip vertically into ends, not straight across. For texture, lift small sections between finger and thumb and trim tiny amounts; this prevents a blunt line.
- Top edge & lip line: Trim the top edge of the mustache by following its natural curve, trimming shorter toward the center only if you want a tapered look. For the lip line, angle scissors tip down slightly and trim hair that rests on the lip; finish with one slow trimmer pass against the grain for crispness.
- Corners & blending: Trim corner hairs diagonally to avoid a boxy look. Blend into the beard using an intermediate guard and feathering motion with the trimmer.
- Final detail: Use the trimmer’s detail blade to define the philtrum, under-nose seam, and side seams. Finish with scissors to remove stray long hairs and to correct any jagged edges.
Mid-routine fixes
Finish by applying a light balm for softness or a small dab of wax for hold — warm wax between fingers, shape, and you’re done.
Troubleshooting, Maintenance, and Styling for Long-Term Results
Troubleshooting common problems
Over-trimmed? Stop heavy trimming and let the area grow for 4–6 weeks. While growing:
Patchy spots: don’t panic. Often patience + strategic trimming wins. Trim surrounding hair to a uniform, slightly shorter length to reduce contrast. Consider a beard/fill powder or tinted balm for special occasions to visually even density. Good nutrition and sleep help long-term growth.
Asymmetry and blunt lines: photograph your mustache straight-on. Use the longer side as the reference; take tiny scissors cuts to match. To soften any harsh horizontal edge, wet the mustache slightly and point-cut vertically into the line until it reads natural.
Tool care to ensure consistent performance
Regular care keeps blades and scissors performing predictably.

Grooming frequency & simple styling tips
Styling: use a pea-size of light mustache wax warmed between fingers for control; a dime-sized balm for softness and conditioning. Apply from center outward, shaping corners last.
When to see a barber
Book a professional for your first precise shaping, major corrections, or persistent asymmetry. A barber can set a template you can easily maintain at home and rescue any haircut disasters — faster and less stressful than DIY trial-and-error.
(Next: Trim Confidently and Keep It Consistent)
Trim Confidently and Keep It Consistent
Combining scissors and a trimmer gives you precise control and a natural finish—start conservatively and build length gradually. Maintain sharp tools, clean blades, and consistent routine to avoid surprises.
Practice the step-by-step method, experiment within the guidelines, and take periodic photos to track progress. Trim regularly, be patient, and enjoy refining your look—small, steady improvements make the clean-cut mustache sustainable and confident. Share your results and keep learning. Start today and enjoy the process.


Helpful article, especially the section on face compatibility and growth pattern. One neutral point though: face shape recommendations are a bit generalized. Some people have mixed hair directions and that changes how you should angle the trimmer.
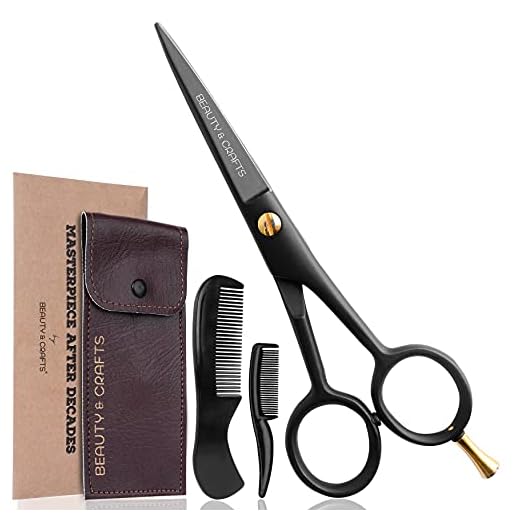
Question — for maintenance, do you guys oil scissors after every use or only when you notice stiffness? Also which product would you recommend for scissor maintenance? I’m using the Beauty & Crafts 5-Inch German set and want to keep them sharp.
Priya — great call on mixed growth patterns; I’ll clarify that in the article (it’s more of a starting guideline than a strict rule). For scissors: you don’t need to oil every use. A drop of light machine oil every few weeks or when you notice resistance is fine. Wipe blades clean after each use and store dry. For sharpening, a professional sharpening once a year (or sooner if you cut lots of coarse hair) will keep them doing great.
Perfect, thanks both — I’ll try oiling every few uses and schedule a sharpening. Appreciate the clarification on face shape tips!
I use a tiny amount of clipper/scissor oil after every few shaves and it feels smooth. Also, avoid cutting damp hair with scissors — it messes up the edge faster.
And if you ever need a direct recommendation: there’s a lot of good affordable scissor oil on Amazon — any light, non-gumming oil from a reputable brand should work well with your Beauty & Crafts set.
Good read. I was torn between the DEMAXA 5-Inch kit and the Ontaki German set — both are mentioned. Anyone tried both and can compare the feel/sharpness? I’m clumsy and want something that won’t go dull after a month.
Also, the safety/prep section was super helpful (who knew a comb could be a lifesaver).
I own both — Ontaki lasted longer for me, but DEMAXA was lighter and easier when I was learning. If you buy DEMAXA, just sharpen or replace sooner. 😀
Nora — great question. DEMAXA tends to be a bit more budget-friendly but still sharp; Ontaki (if it’s a true German steel) will typically hold an edge longer. If you’re clumsy, consider the Small Curved set for precision in tight spots, and keep scissors oiled and stored dry to prevent dulling.
Oh man, this guide saved my mustache from becoming a sad pencil line. Seriously.
Line 1: I tried trimming freestyle last month and looked like a caterpillar.
Line 2: Followed the step-by-step routine here and the diff between scissor texturing + trimmer clean lines is night/day.
Line 3: Pro tip — do the first trim with natural light and a mirror at face level.
Line 4: Also, small curved scissors are an absolute must for under-the-nose cleanup.
10/10 would recommend to friends. Also — shoutout to the Philips Norelco Multigroom 13-piece, battery lasts for ages.
Thanks for the specifics, Marcus. I’ll add a short note recommending the two-pack for beginners who want separate tools for detailed spots.
I got the Small Curved Facial Grooming Scissors Two-Pack — one for the nose/philtrum area, one for mustache tidying. Cheap and priceless.
Haha same — my ‘before’ was tragic. The 13-piece Multigroom is my go-to for quick touch-ups when I’m running late.
If anyone’s worried about battery life on the Multigrooms — keep a micro-USB (or provided cable) in your drawer for a quick top-up. Saved me twice before important meetings.
Love the caterpillar metaphor 😂 Glad the routine helped. Natural light is underrated — I’ll add that pro tip to the article. Which small curved scissors did you use?
Short and sweet: I followed the trimmer section and didn’t accidentally shave my soul off. Progress! 😅
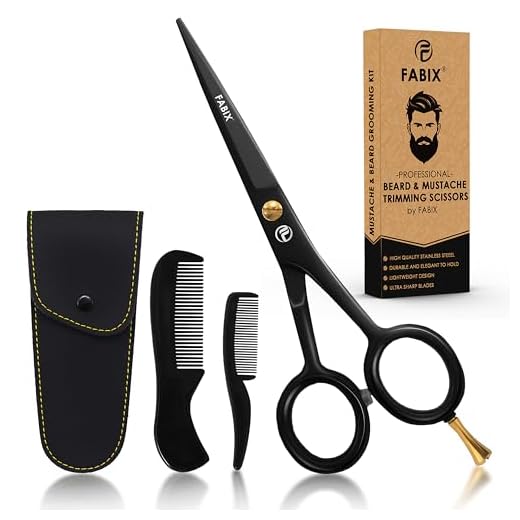
The 5-Inch Professional Beard and Mustache Scissors Set is sharp as heck, though I nicked myself once (user error). Love the troubleshooting tips.
Glad to hear it, Owen — nicking happens to the best of us. Tip: trim in small increments and comb between passes to avoid surprises.
Same here — start longer guard length on the trimmer and work down. Saves face… literally.
Great guide — really clear steps for combining scissors and trimmer. I picked up the Philips Norelco Multigroom 3000 after reading this and it made the whole “clean lines” part way less scary. The scissors section helped me stop over-thinning the center of my mustache.
Only minor gripe: wish there were a couple more photos of the scissor angles. Otherwise, solid beginner-friendly tips.
I had the same issue with angles at first — a trick I use is to hold scissors parallel to the lip line and trim vertical snips, not slicing. Helps keep the natural texture without over-thinning.
Thanks Liam — glad the Multigroom 3000 worked out! I’ll see about adding a couple more angle photos in the next update. If you want, tell me which part of the angle you found confusing and I can add a quick sketch or extra wording.
Also a heads-up: the Small Curved Facial Grooming Scissors Two-Pack is great for those small vertical snips near the philtrum if you want more control.