Master Clipper-Over-Comb in One Clear Journey
Learn the core clipper-over-comb technique—safe, efficient, and salon-ready. This 6-step guide breaks down fundamentals, tool choices, hand positioning, blending, finishing, and practice routines so beginners gain confident, repeatable results. Includes clear photos, timing cues, and pro troubleshooting tips for beginners.
What You Need Before You Start

Step 1 — Know the Technique: Why Comb First Wins
Curious why barbers always lift hair with a comb? It’s precision and control, not magic.Master the comb-first approach: use the comb to lift and isolate hair while the clipper trims only the bits that extend past the comb’s teeth. Picture holding a comb like a ruler—anything above it gets removed.
Choose clipper-over-comb when removing bulk, creating fades/tapers, or blending short-to-short transitions. Use scissor-over-comb for longer lengths, precision texturizing, or when you need softer edges (e.g., scissor-finishing a scissor cut).
Change the comb angle to change the result: hold the comb flatter for longer weight, tilt it upward for increased graduation, or rotate it toward vertical for very short, stacked layers.
Move clippers away from the scalp at the correct angle, maintain steady comb pressure, and avoid pinching skin between teeth.

Step 2 — Hold It Right: Grip, Angle, and Posture
One small shift in grip can halve mistakes — are you holding your tools wrong?Hold the comb like a pencil: pinch between thumb and forefinger for fine control and use the other hand to stabilize the clipper with a relaxed wrist.
Tilt the comb about 30–45° from the scalp for smooth blending; hold it flatter to remove bulk. Change the comb angle to change cut length—raise the comb to create graduation, flatten it to keep more weight. For example, tipping toward vertical shortens dramatically; flattening preserves length.
Position yourself and the client: ask the client to chin down for the nape and chin up for the crown. Stand with good posture and square shoulders.

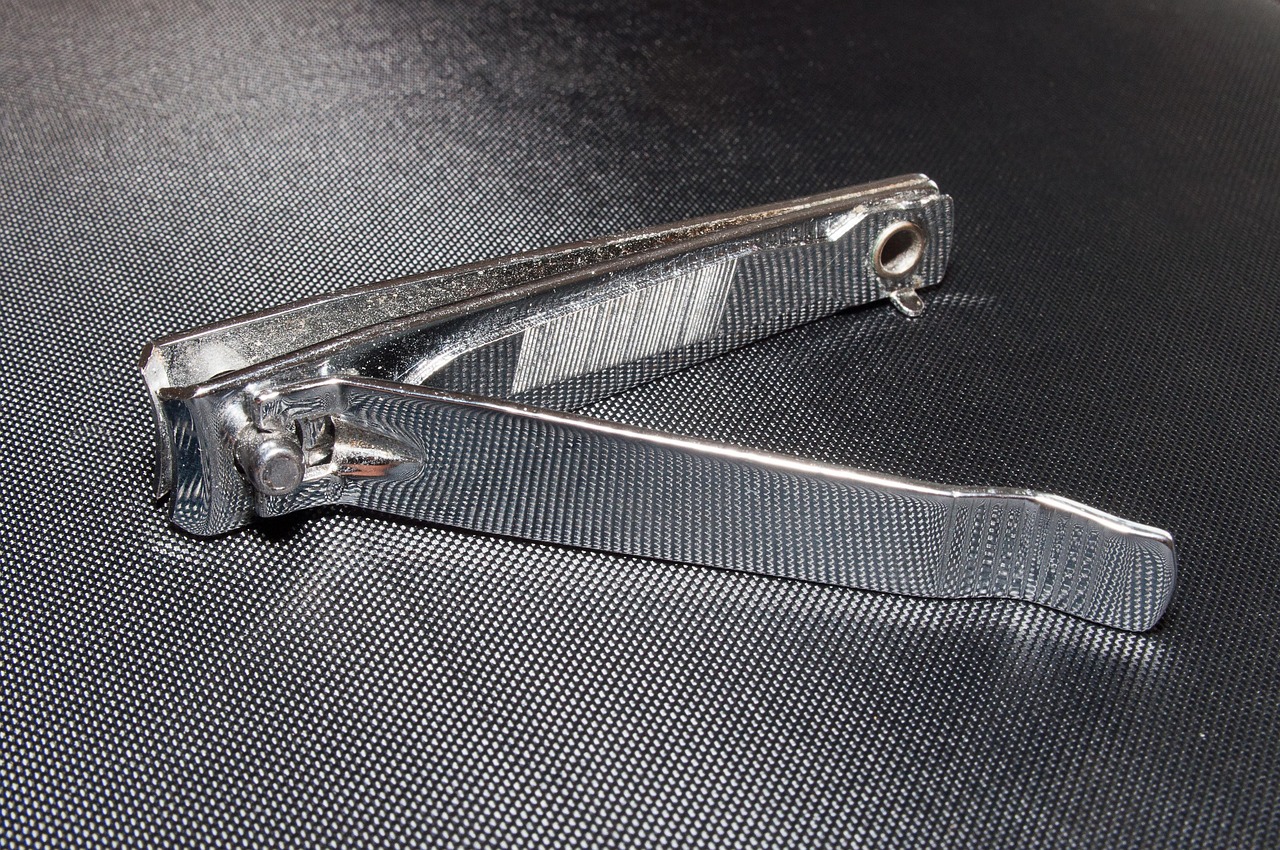
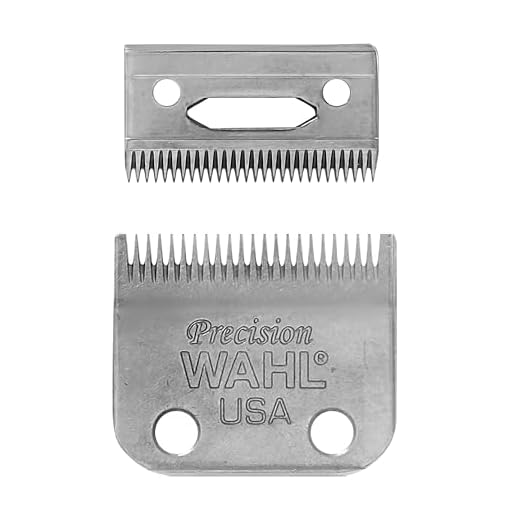
Step 3 — Choose the Right Tools: Blades, Guards, and Combs
A comb is not a comb — pick the right teeth, and you halve your blending woes.Pick blades by purpose: smaller blade numbers cut closer; larger numbers leave more visible length. Use coarse-tooth blades for thick hair and fine-tooth (finish/taper) blades for crisp edges and detail work around ears and neck.
Select combs deliberately:
Combine guards and comb elevation for predictability: attach a guard to set baseline length, then lift the comb higher to add length or lower it to shorten. Flip the clipper’s taper lever to micro-adjust between guard sizes and soften lines.
Maintain blades: remove hair, brush and blow out debris, oil blades after each use, check alignment and tighten screws to keep cuts consistent and safe.
Step 4 — Cutting Technique: Strokes, Speed, and Sequence
Small, consistent strokes beat one big swing every time — precision wins.Start at the sides and back: hold the comb flat, lift sections to desired elevation, and remove bulk with longer, smooth strokes moving up and out. Work around the head to the crown, use shorter, controlled strokes where the head curves, and finish the perimeter last to tidy edges.
If you spot uneven patches, stop, comb the area, lower the comb slightly, reduce blade exposure, and rework with short overlapping strokes — never rush or overcut.

Step 5 — Blend and Texture Like a Pro
Want invisible transitions? The right flick and fade will convince anyone it was effortless.Blend with controlled flicks and varied comb pressure to soften transitions. At the end of each clipper stroke, flick the clipper outward at a 30–45° angle to feather the edge — imagine wiping away a pencil line. Press the comb firmly for a blunt pass, then lighten pressure and use just the comb’s teeth to create micro-layers.
Texturize by point-cutting with scissors over the comb for airy ends, or run the clipper at an angle (tilted blade) for soft, broken-up texture. Thin strategically in the interior to remove weight without losing shape.
Use this checklist to inspect and fix blends:

Step 6 — Practice, Evaluate, and Troubleshoot
Practice like you mean it: 15 focused minutes daily beats a weekend crash course.Begin a progressive routine: warm up with 5–10 minute drills on a mannequin (sides, crown, nape), then replicate three basics — crew cut, tapered fade, textured crop — in time-boxed sessions of 15–30 minutes each.
Use this checklist to evaluate every cut:
Follow this troubleshooting flow for common issues:
Record from multiple angles, seek peer feedback, keep a log of fixes, oil blades, clean combs, and role-play consultations to practice client communication.

You’re Ready to Cut With Confidence
Mastering clipper over comb takes focused practice and the right habits; follow the six steps, track your progress, practice on a model, share results with the community, refine your technique, and start cutting confidently, show your work and inspire others.


Short and sweet: the posture drills worked. Did 10 minutes a day for a week and my wrist doesn’t ache anymore.
That’s awesome, Mia. Consistent micro-practice beats occasional marathon sessions every time.
First off, huge props for the troubleshooting section. Helped me fix my ‘uneven blends’ problem fast.
Also, tiny rant: why do some tutorials skip the bit about comb thickness? It makes a massive difference. Anyway — this one didn’t skip it, so THANK YOU.
Great tip, Chloe — labeling tools saves time in a busy kit.
Same. I mix combs depending on the haircut. Handy little tip: mark your favorite comb with tape so you don’t lose it 😅
Totally — comb thickness affects tension and lift, which changes how much hair the clipper removes. We tried to cover those little details because they add up.
Also, different brands feel different. Try a few before committing to a full set.
Yes! Thicker comb = more hair lifted = different result. Wish I learned that sooner.
Really liked Step 2 — posture stuff is often overlooked. I was surprised how much my wrist angle changed things.
This guide was super clear — I loved the ‘Comb First’ rationale. Tried it on my partner yesterday and the edges looked way cleaner. Quick note: my clipper has a weird vibration at slow speed, any tips on compensating while learning the stroke?
Or use a guard for the first few passes until you get comfortable with the vibration. Saved my sanity when my clipper was acting up 😂
Glad it helped, Emma! For vibration, try shorter, lighter strokes and support the hand with your pinky against the head for stability. Also check blade alignment and tighten any loose screws.
If it’s an old motor, sometimes a tiny bit of oil helps. Also increase speed slightly — that can smooth the feel of the clipper.
I tried the ‘blend and texture’ tips last night. The result was better, but I’m struggling with back-of-head blending. Feels like the clipper slips when I reach around—any hacks?
Use the mirror trick if you’re working alone: a small mirror behind helps see angles and prevents over-reach.
And slow down. Rushing that area is how you make mistakes. Patience = cleaner blends.
Try switching to a shorter guard or removing the guard for the final passes and support the head with your free hand. Also rotate your client slightly if possible so you can approach the area more ergonomically.
I’m skeptical about the ‘one clear journey’ idea. Everyone learns differently. That said, the progressive steps are solid. Maybe include alternate paths for self-learners vs students?
Valid point. The ‘one journey’ is meant as a clear baseline. We’ll consider adding parallel tracks — quick-start, in-depth, and salon-student paths — in a future revision.
I appreciate the confidence-building final section. The ‘you’re ready to cut with confidence’ part made me actually book practice sessions instead of procrastinating.
Small critique: a quick checklist PDF download would be so useful.
Noted! Checklist + flowchart could be bundled in the next update.
Yes please — my phone isn’t always nearby during practice sessions, so a paper checklist would be perfect.
If they add a PDF, include a ‘troubleshooting flowchart’ — that would be next level.
Thanks Mark — a printable checklist is a great idea. I’ll work on adding that for quick reference.
This guide made me realize I’ve been holding the comb wrong for years… facepalm. Step 2 visuals were clutch. Also, the bit about sequence saved me from ‘mullet disasters’ 😂
Tool recs in Step 3 were super practical. I wish there was a short budget vs pro list, though — not everyone can drop a ton on blades.
Great point. I’ll add a quick budget/pro breakdown in the next update — thanks for the suggestion!
Agreed. I use mid-range blades and change them often. Feels like the sweet spot for price/performance.
Long post because I want to be helpful:
Step 1 changed my whole approach. I used to cut randomly and patch things up later. Now I start with comb first, map the length, then work in sections like you suggested. Results are more predictable.
Also: invest in good lighting. You won’t realize how much you’re missing until you see the same haircut in daylight.
Keep these guides coming. Seriously useful.
Yes to the lighting tip. My bathroom lights are garbage, lol.
Thanks Chloe — that’s a thorough practice routine. Lighting is massively underrated; natural light or a daylight lamp makes a huge difference.
Loved the humor sprinkled throughout the guide. Kept me from dozing off during the theory bits. 👍
Tried to follow the sequence and accidentally shaved a patch near the ear. 😭 It’s humbling. On the bright side, the troubleshooting tips helped salvage it. Lesson learned: go slow and double-check guard size!
We all have those moments, Zoe. Guards and visual checks before each pass are lifesavers. If it’s still noticeable, blending the edges with a trimmer can help.
If it’s a small patch, try wetting and combing the area and doing the last blend pass very slowly with a shorter guard.
Been there. I kept a disposable cap for quick fixes — covers mistakes until you can correct them properly 😅
I have a weird question: for very curly hair, does clipper-over-comb still apply or is it more scissor work? Kinda split between methods rn.
Great question. For very curly hair, clipper-over-comb can work for tapering and fades, but scissor-over-comb or scissors might be better for shaping and preserving curl pattern. Often a combo approach is best.
One more tip: use wider-toothed combs for curls to avoid flattening the texture too much.
Also consider wetting/conditioning the hair first; curl relaxation slightly helps when doing clipper work.
Agree — I blend with clippers for the sides and do scissors on top to keep the curls looking natural.
Okay, confession: I used to yank the comb through like a maniac. After following the ‘strokes, speed, and sequence’ section I dialed it back and actually got a cleaner blend. Also, the troubleshooting checklist in Step 6 is gold.
One question: do you recommend practicing on a wig head first or just family/friends?
One tip: record yourself while practicing (even on a mannequin). Playback helps spot grip/angle problems you don’t feel in the moment.
Started with a mannequin, then moved to my roommate. Mannequin is forgiving, real hair isn’t — both are worth it.
If you can get both, do it. The mannequin helps muscle memory; a person teaches you posture and communication.
Wig heads are great for basics — they let you focus on technique without worrying about reactions. But after a while, practicing on a real person is invaluable for learning how hair reacts in real-world situations.