Why Cutting Curly Hair for Men Actually Works (When Done Right)
Curly hair needs a DIFFERENT, shape-focused approach than straight hair to avoid frizz, shrinkage, and uneven length. This guide shows how to prepare, section, cut for natural shape, blend sides and back, and maintain results. Follow clear steps for reliability.
What You'll Need

Cutting 2B/2C Curly and Wavy Hair: Quick, Pros-Approved Techniques
Prep: Know Your Curl and Set the Stage
Not all curls are equal — learn the single trick that changes everything.Identify your curl pattern, density, and expected shrinkage so you can predict final length. For example, loose curls (longer stretch) shrink less than tight coils (can shorten 30%+ when dry).
Clean the hair so you can read the shape. Choose your cutting method: slightly damp for more control, or fully dry to see natural spring and final length. Dry cutting is best if you want exact shape; damp is easier for even trims.
Detangle gently with your fingers or a wide-tooth comb, working from ends to roots. Apply a light leave-in conditioner or water mist if the hair feels stiff or frizzy—avoid heavy creams that collapse curl.
Decide target length and overall silhouette before snipping. Ask yourself: shorter sides, longer top? soft layers or a rounded shape?
Create a visible guideline at the crown or fringe: twist a small curl to the desired length and clip it. Use that locked-in reference as you move around the head—good prep prevents big mistakes and keeps curls consistent.

Section and Secure: Create Order from Chaos
Divide like a surgeon, but friendlier — 4 sections, infinite possibilities.Partition the hair into clear sections: top, both sides, and back.
Use clips to hold each area and work on one section at a time so you can maintain symmetry.
Make a central guideline across the crown by clipping a small panel straight down the middle; make a horizontal guideline at the occipital bone for the back to control length and weight.
Follow natural part lines and curl clumps rather than forcing straight partitions. Move fingers through the hair and separate along where curls already group—this keeps the final shape organic.
Label which sections you’ll trim shorter and which will maintain length (for example: sides shorter for a tapered finish; top kept longer for volume).
Secure dense areas with extra clips or small ponytails so you don’t accidentally grab too much.
Work clockwise around the head, releasing one section at a time. This method helps manage density, prevents overcutting, and makes later blending much simpler.

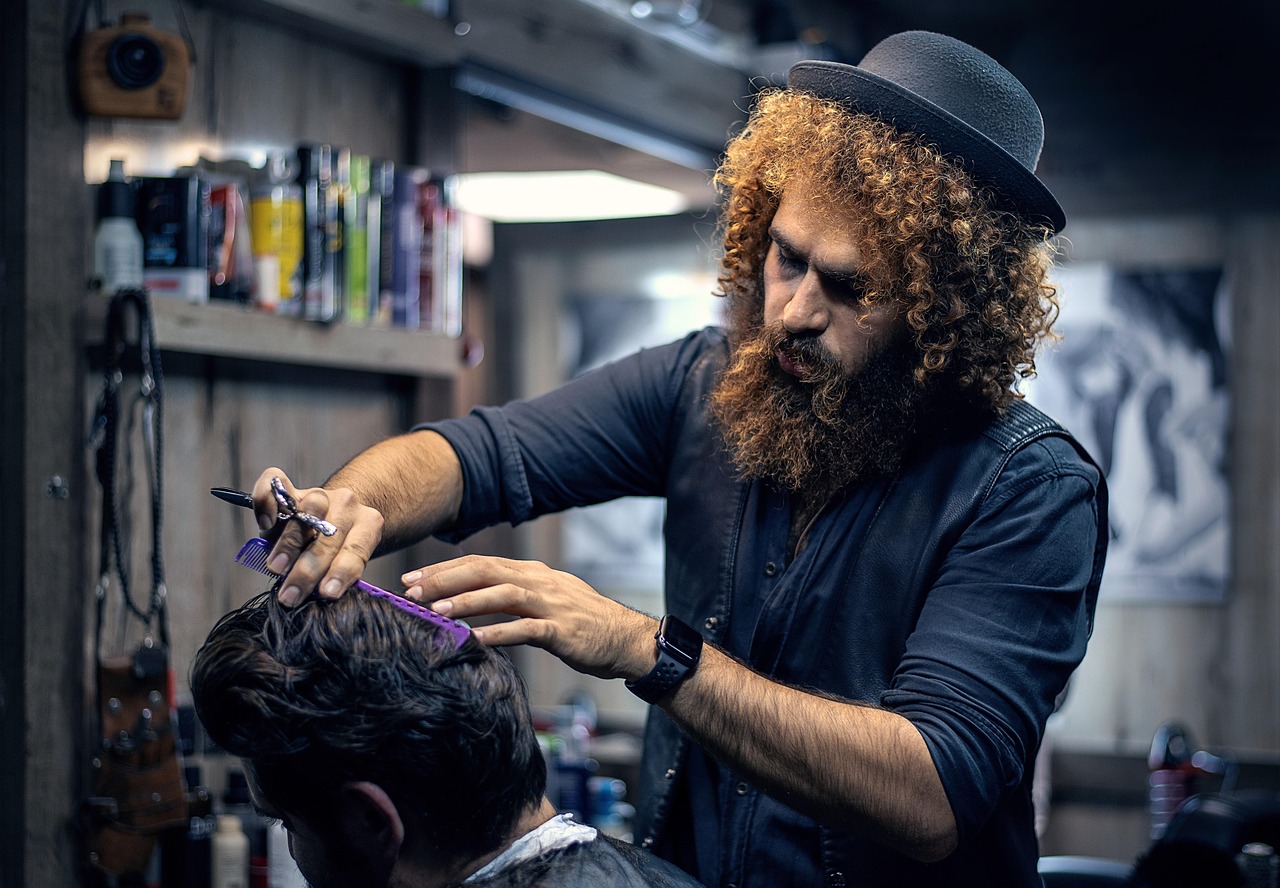
The Cut: Trim Dry or Wet? The Method That Preserves Shape
Cut curls dry — yes, really. Wet cutting lies to you.Trim dry for most curls so you see how each strand springs and where weight sits. Stand back often and let the hair fall naturally to check the overall silhouette — think of it like stepping away from a painting to see the composition.
Use point-cutting: snip vertically into the ends of curl clumps instead of making blunt horizontal cuts. Aim to remove 1/4–1/2 inch per pass and recheck; this softens edges and keeps movement.
Work with natural curl groups. Take one curl cluster between finger and thumb, lift slightly, then cut into the ends. Example: if a curl flips up at 1 inch, remove only the tip so the curl still coils without shortening mid-shaft.
Use clippers on the sides if you want a tapered look, but always finish the top with scissors to preserve texture and avoid a helmet effect.
Keep your hands relaxed and move slowly; err on the conservative side because you can always take more off later.
For most curls, dry cutting reveals true spring and shape — trim small amounts and recheck the fall. Use point-cutting to remove bulk and maintain natural edges: snip vertically into ends of curl clumps rather than blunt horizontal cuts. Work with natural curl groups, cutting in 1/4–1/2 inch increments and constantly letting hair fall to check shape. For men who prefer clippers at the sides, use scissors on the top to keep movement. Keep your hands relaxed and move slowly; err on the conservative side because you can always take more off later.

Refine and Blend: Shape the Sides, Back, and Top
A little blending makes you look three years younger — no magic.Blend the top into the sides using scissor-over-comb or low-guard clipper work so density matches and there are no abrupt lines. Work slowly and compare the two areas as you go.
Choose a guard length that complements the top — for example, a 2″ top often sits well with a #4 (½”) or #3 (⅜”) taper. Decide between a hard fade for contrast or a soft taper for a natural finish.
Check transitions from multiple angles: stand in front, sit behind, and view from both sides. Rotate the client’s head and inspect the line where top meets side.
Soften any harsh lines with thinning shears or short, vertical feathering cuts into the transition zone. Use small, subtle snips rather than one big cut.
Clean the nape and around the ears with curved, confident strokes; a tidy, slightly curved edge looks finished. Revisit the crown and frontal guideline, lifting curl groups and trimming tiny amounts until the silhouette reads balanced and moves naturally when styled.

Style and Maintain: Finish with Product and a Plan
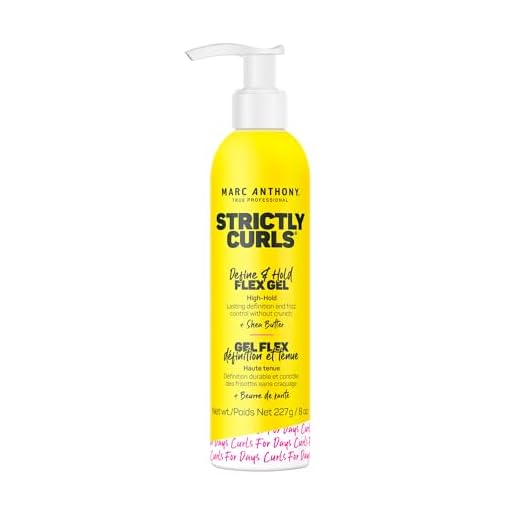
Want defined, frizz-free curls tomorrow? This maintenance plan keeps them sharp.Finish by applying the right product: use a light cream (leave-in curl cream) or curl-defining gel and scrunch it through for hold without crunch.
Diffuse on low heat or air-dry while scrunching to enhance curl formation — for example, cup curls with your hands and lift at the roots as you dry.
Secure hair for sleep with a silk pillowcase or pineapple your hair into a loose, high bun with a soft scrunchie to preserve shape and reduce friction.
Schedule home touch-ups and professional reshapes:
Refresh on messy days: mist hair lightly with water or a water–leave-in mix and scrunch to reactivate product and spring.
Troubleshoot quickly: add moisture (leave-in, oil) if frizz appears; reduce product weight or wash heavier products out if shape collapses; refresh with a spritz and scrunch when curls go flat.
Ready to Rock Your Curls
Follow these steps patiently and conservatively; with proper prep, careful sectioning, measured cutting, blending, and a maintenance plan, you’ll keep curly hair tidy, natural, and stylish—ready to rock your curls?


Would love a follow-up on fades for curly hair — the guide touched on sides/back but not detailed fade techniques. Anyone tried blending curly top into a faded sides look?
Yes! Use longer guards on top of sides and fade down slowly. And trim top dry to keep the curl shape.
Barbershop tip: tell them you want texture on top and a soft blend, not a hard line. Communication matters.
Good suggestion — a focused article on fades with curly texture could be next. In short: keep the transition gradual and work with the curl pattern when choosing clipper length.
I appreciate the ‘why it works’ section. Kinda changed my mindset from ‘fixing’ to ‘working with’ my curls. Little tip: take photos before and after so you can track changes.
100% — photo diary saved me when I tried a dramatic change and then regretted it.
Photos are great for tracking shape changes — and helpful if you need to explain what you want to a barber later.
Quick PSA: do not try to cut your own hair with dull scissors. Learned the hard way. 😂 The guide’s part about tools should be a sticky at the top.
Ouch — we included a tools checklist for that reason. Sharp shears + a comb = night and day.
Alternative: take them to a barber to get them sharpened. Cheaper than buying new tools.
Yep, invest in decent scissors. Barbershop shears are pricey but worth it if you cut at home a lot.
Okay this is long but I promise it’s helpful:
I tried the guide last month. First, I read the whole thing twice. Then prepped with a leave-in and microfibre towel.
I sectioned into 6 parts (per guide), clipped, and trimmed dry for shape.
Refined the back with a handheld mirror and made tiny snips for layering.
My curls look way more intentional now. Honestly, patience + small cuts = win.
Nice! How long did the whole process take you the first time?
About 90 minutes first try, but now it’s closer to 45 for touch-ups.
Amazing detailed walk-through — thanks for sharing your process, Aaron. The multiple steps and patient approach are exactly what we recommend.
A small constructive point: the product recommendations felt a bit vague. Maybe include a few brand examples for different budgets? That would make step 5 super actionable.
Totally noted — we’ll add budget-friendly and premium examples for creams, gels, and leave-ins in the next update.
Agree. Even ingredient callouts help if you prefer shopping by formula rather than brand.
Big fan of the ‘refine and blend’ section. Shaping sides and back is the hardest part imo — the guide’s layering tips made it doable at home.
Pro tip: use a long comb to lift and check. Makes blending less scary.
Blending is an art — take small cuts and step back often. Happy you found the layering tips helpful!
Loved the sectioning tips — creating order from chaos is literally the only reason I made it through a home trim. The clips recommendation worked wonders.
Glad it helped! Small sectioning shapes make a big difference — especially on the back where you can’t see as easily.
Agreed. I use small clips and a mirror setup. Also, bend-your-neck technique helped me see the lower back better.
Does anyone have a go-to product from step 5 for low-hold but high-definition? I want my curls to move, not be crunchy. Suggestions?
Look for lightweight creams or leave-in conditioners with curl-defining ingredients (glycerin, light oils). Avoid heavy gels if you want movement.
I use a small amount of curl cream and scrunch — keeps it soft. Also mix a tiny bit of oil if humidity’s high.
I recommend a curl custard for definition but dilute it with leave-in for less crunch.
Sea salt sprays can add texture without stiffness, but careful with dryness.
Took the guide slow, did a conservative trim, then styled with a diffuser like step 5 suggested. Results: less frizz, better shape.
One tip: when refining, step far away from the mirror and check silhouette too — not just individual curls.
Silhouette checks saved me — I kept trimming little bits thinking it wasn’t enough and ended up too short before realizing the overall shape was fine.
Great tip about silhouette — hair looks different up close vs from a distance. Thanks for sharing!
This guide is way better than the random YouTube tutorials I watched. Clear steps, realistic expectations. Also loved the maintenance plan — trim every 6-8 weeks worked for me.
If you’re growing it out, stretch to 10-12 weeks but expect more shaping work each time.
6-8 weeks is my sweet spot too. Any longer and it loses shape, any shorter and it’s a lot of upkeep.
Thanks Hannah — consistency with trims and product routine really keeps the shape looking fresh.
Not a fan of the ‘trim wet’ parts — felt weird when the curls bounced up later and left me with shorter-than-desired hair. Maybe emphasize more warnings for different curl types?
Great feedback. We do suggest dry trimming for shape preservation, but we’ll add clearer warnings about shrinkage and which curl types should avoid wet trims.
I think the guide already leans dry, but another callout wouldn’t hurt.
Yeah, wet trims are for bulk control or very loose curls. Tight curls = dry all the way.
This guide was super clear about prepping and knowing your curl type — saved me from a disaster. Trimmed my sides following step 4 and it actually looks balanced. Quick question: anyone else find that their curls shrink more when dry-cut?
Totally. My 3A shrinks a bit, but 3C friends see way more. I mark length when dry and then touch up slightly when wet.
Yes, curl shrinkage is real — that’s why the guide emphasizes dry vs wet cutting. For tighter curls, trimming dry helps preserve the shape and avoid over-cutting.
I do a test strand dry first. If it’s too short, I back off — trust me 😂
I was skeptical about cutting curls dry, but the ‘method that preserves shape’ really works. My hair looks less poofy and has better definition now. Thanks!
So glad to hear that! Dry cutting helps you see natural fall and prevents losing curl definition that happens when hair is stretched.
Same here. But if your curls are super frizzy when dry, do a tiny bit wet first to remove bulk, then refine dry.
Humor time: I cut one side shorter on accident and now I look like a trendy cartoon character. 😂
Seriously tho, the section on blending saved me from disaster — fixed most of it.
Haha, haircut mishaps are rite of passage. Glad the blending tips helped salvage it!
Cartoon character = vibe. Own it ✨
Small typo spotted in the ‘Prep’ section (extra ‘the’ in the second paragraph). Otherwise excellent content. Love the approachable tone — not preachy.
Good eye 👀 typos are sneaky.
Thanks for catching that! We’ll fix the typo in the next update — appreciate the read and the kind words.