Why a Thoughtful Barber Kit Matters
Ever wondered why some barbers work faster and always deliver clean results? A well-chosen kit speeds service, improves quality, and makes clients feel comfortable. The right tools also protect hygiene and build your professional reputation.
This article walks through the essentials you need: clippers, shears, shaving gear, combs, sanitation supplies, and smart storage. Think of your kit as an investment in efficiency and repeat business. Use these recommendations to build a portable, reliable setup that lets you focus on craft and clients.
Whether you are starting out or upgrading, curating tools wisely makes every haircut smoother and more professional today.


Clippers & Trimmers: The Core of Your Cutting Setup
Types & Tasks
Full-size clippers (e.g., Wahl Senior, Andis Master) handle bulk cutting and classic tapering. Lightweight cordless models (Wahl Magic Clip cordless, BaBylissPRO) shine for mobile work and quick fades. Detail trimmers (Andis T-Outliner, Oster Fast Feed) are for outlining, necklines, and crisp edges. In a busy shift you’ll use: bulk clippers for length removal, a cordless for fades and blending, and a trimmer for hairlines and beards.
Motors: Power, Noise, and Heat
Choose magnetic for speed on thinner hair, pivot for steady torque, and rotary for all-day power and quieter operation.
Battery Life & Corded vs Cordless
Cordless convenience: look for lithium-ion with 60–120+ minute runtime and fast charging. Corded gives consistent power for long bookings—bring a cordless backup to avoid downtime between clients.
Buying Tips: Blades & Guards
Maintenance & Backups
Daily: brush debris, oil blades, and check alignment. Monthly: deep clean, sharpen/replace blades. Carry backups: a second cordless, a charged spare battery, and a compact detail trimmer.
Ergonomics, Noise & Vibration
Pick a weight and handle shape that fit your grip—lighter models reduce fatigue on long shifts. Low-vibration motors improve comfort for you and nervous clients. Next, we’ll move into the precision world of shears and cutting tools, where hand skills meet tool choice.
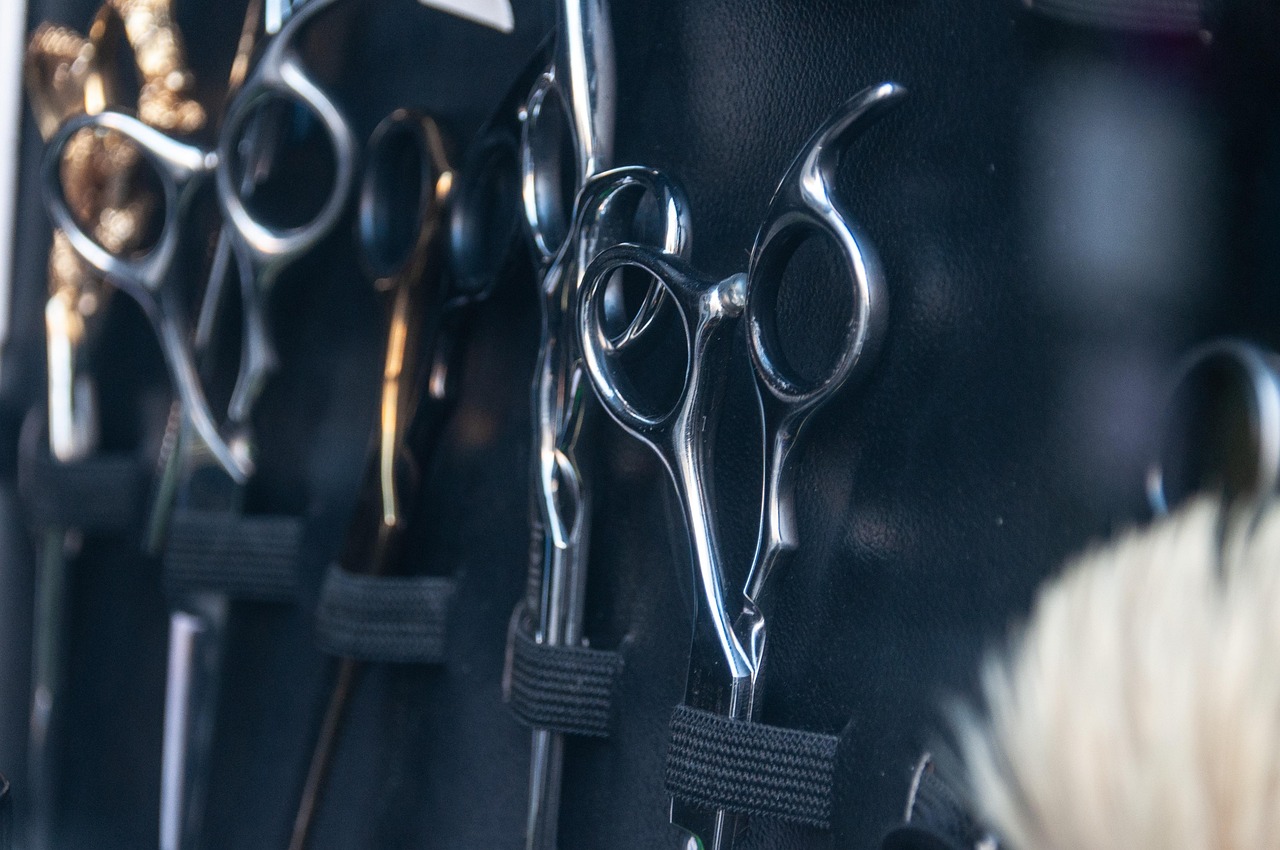
Shears & Cutting Tools: Precision for Every Style
Roles of different shears
Classic cutting shears: your everyday tool for blunt cuts, scissor-over-comb, and shaping.
Thinning shears: remove bulk and soften lines; ideal for over-thick hair and quick texturizing. Tooth counts (15–30) matter: fewer teeth = heavier removal, more teeth = subtle blending.
Texturizing shears: more aggressive than thinning shears; used to break up weight and add movement.
Blending tools (chunkers, razors, feathering shears): create lived-in texture and finish around the perimeter—great for modern men’s styles and soft fades.
Blade materials & edge types
Common steels: VG10/440C, high-carbon stainless, cobalt alloys—choose corrosion-resistant steel that holds an edge.
Edge types:
Handle designs & technique
Offset: natural wrist position, reduces fatigue for long shifts.
Crane (swivel): allows varied angles and fine control for scissor-over-comb.
Choose a handle that suits your grip—try several in-shop; comfort beats aesthetics.
Buying guidance & sizes
Prioritize: balanced weight, responsive tension system, and reputable brand (Joewell, Mizutani, Jaguar, Hikari). For services:
Care tips & maintenance plan
Have shears professionally sharpened/serviced every 3–12 months depending on workload—use manufacturer-authorized sharpeners or specialized shear shops. Up next: shaving and finishing tools to complete the polished look.
Shaving & Finishing Tools: Razors, Brushes, and Aftercare
Choosing a razor: straight, shavette, or safety
Straight razors deliver the closest shave and silky edges but require stropping, honing, and a longer learning curve. Use them for ultra-clean necklines and traditional full shaves once you’ve practiced on training heads or under mentorship. Shavettes (replaceable-blade straight razors) give similar control for lines with less maintenance and lower infection risk—great for busy shops doing detail work. Double-edge safety razors (Merkur, Edwin Jagger) are forgiving, cost-effective, and ideal for barbers learning blade angles. Safety tip: always shave with short, light strokes at roughly a 30° angle; keep skin taut and go slow on the first 20–50 professional shaves you give.
Brushes, mugs, and lather tools
Badger brushes (Silvertip for luxury, Best/Two-band for durability) give thick, dense lather; synthetic knots (Omega, Parker) dry faster and are cruelty-free. Keep a shallow shaving mug or brush bowl with good wrist clearance for building lather; a countertop brush stand helps drainage and prolongs knot life. A quick real-world tip: a dense synthetic loaded with cream produces a warmer, more consistent lather on back-to-back clients.
Pre-shave, creams/soaps, and finishers
Stock a light pre-shave oil for coarse beards, a high-fat shaving soap for slick glide (e.g., Taylor of Old Bond Street), and a cream for speed. Aftershave balms or healing oils with allantoin, glycerin, or jojoba soothe skin—choose unscented or low-menthol options for sensitive clients.
Hot towels & hygiene
Heat towels in a professional steamer to ~45–50°C (avoid scalding). Fold into thirds, test discreetly, drape across the face for 30–60 seconds to open pores, and remove gently. Sanitation: launder reusable towels at ≥60°C, use separate dirty/clean bins, and consider single-use towels if cross-contamination risk is high.
Maintenance & safe disposal
Strop daily; hone straight razors quarterly (or as needed). For shavettes and DE blades, replace after a few shaves and discard into a blade bank or medical sharps container—never the trash loose. Wipe, dry, and oil metal parts; store blades locked and labeled.
Next: the tools that shape that finished look—combs, brushes, and styling implements.
Combs, Brushes & Styling Implements: Tools for Shape and Texture
Essential combs and when to use them
Pick a small, versatile set and you’ll cover most styles:
Tooth spacing matters: tighter teeth give smoother, sleeker lines and control for fine hair; wider teeth add separation and preserve texture. Materials matter too — cellulose acetate combs hold static less and are gentle, carbon/nylon resist heat and chemicals, and stainless steel tails give a durable parting tool. I favor a YS Park cutting comb for precision and a wide-tooth Kent for curly clients.
Brushes, drying tools & styling implements
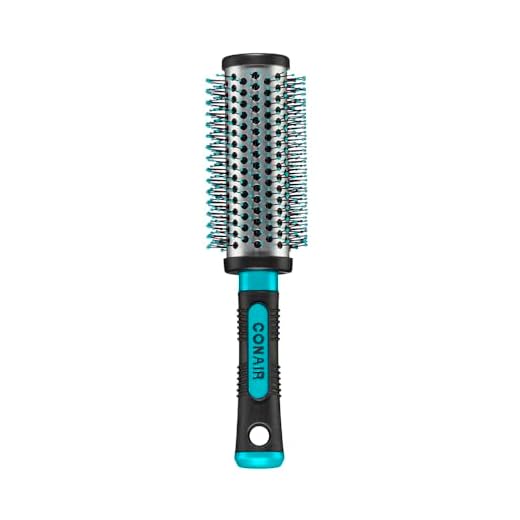
Use brushes to shape, add volume, and distribute product; use combs for accuracy and tension during cutting. For heat styling, choose nylon bristles with heat-resistant cores or ceramic barrels to avoid melting and maintain grip. In practice: when you want a full, brushed-back look, use a large round brush with a concentrator nozzle; for tapered edges, switch to a fine-tooth comb.
Care, rotation & quick tips
Clean brushes weekly with warm water, mild shampoo, and a detangling comb; soak plastic/synthetic combs briefly in barbicide or 70% IPA following label directions. Keep at least two of each commonly used piece so one set can be cleaned while the other is in service—this cuts downtime in a busy shop.
Next up: the systems that keep these tools sanitary and performing like new.
Hygiene & Maintenance: Cleaning, Disinfecting, and Tool Care
Infection-control essentials
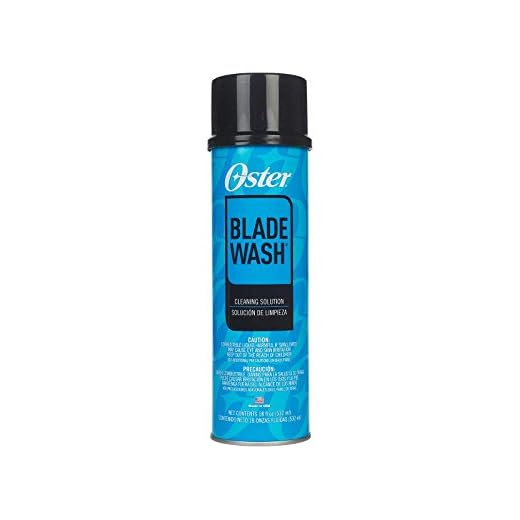
Cleanliness protects clients and your reputation. Stock barbershop-grade disinfectants (Barbicide or EPA-registered hospital disinfectants), clipper sprays (Clippercide, Andis Cool Care), and blade wash for dipped blades. Keep single-use items—neck strips, razor blades, foil guards—visible and handy. For towels: use reusable linens washed in hot water and high-heat drying, or deploy disposable towels/neck strips when turnaround or infection risk is high.
Between-client workflow (how to)
Tool-specific care & chemical safety
Follow manufacturers: some oils and disinfectants can corrode blades or plastics. Use blade oil (Andis/Oster oils) sparingly—one drop between teeth while running. Avoid bleach on carbon-steel shears. If using a UV cabinet or dry-heat sterilizer, confirm it’s appropriate for your tools and labeled to kill pathogens.
Preventative maintenance & troubleshooting
Opening/closing checklist
A reliable hygiene routine saves time, prevents infections, and extends tool life—setting you up perfectly for smart storage and building a truly portable pro kit.
Accessories, Storage & Building a Portable Professional Kit
Essential accessories to round out your kit
Capes (waterproof and neck-friendly), an apron, multiple towel sets, and disposable neck strips are small buys that dramatically improve client comfort and workflow. Add a clipper stand, a mat for anti-fatigue comfort, and heavy-duty extension cords or power strips with surge protection. For secure storage of blades and razors, use hard cases or blade wallets to protect edges and avoid accidental cuts.

Tailor your kit for the service mix
Barbershop-only: prioritize fixed storage (wall racks, a heavy-duty rolling cart), plentiful linens, and full-size chairs.
Mobile services: prioritize portability—compact travel clippers (Cordless high-torque models), multi-voltage chargers, battery backups, and a lockable rolling case (think Pelican 1510-style or flight-compatible hard cases).
Event work: add pop-up chairs or portable stools, folding mirrors, extra lighting, and a small cash/ POS pouch. For all mobile work, must-haves are spare cords, multi-voltage chargers, battery banks, and secured razor cases.
Organization tips that save time
Low-cost items with big impact
A well-organized kit keeps tools protected, cuts setup time, and makes mobile work professional and profitable. Up next: Build Gradually, Maintain Consistently.
Build Gradually, Maintain Consistently
Start by equipping your kit with core clippers, a reliable set of shears, essential shaving tools, and basic combs — then add specialized items as your services grow. Be intentional: choose quality over quantity, and make hygiene and routine maintenance non-negotiable to protect clients and your investment.
Keep backups for blades, guards, and chargers so you never compromise a service. Regularly clean, disinfect, and oil tools to extend lifespan and performance. Take a moment now to audit your current kit against the checklist in this article — small upgrades and consistent care are the difference between good and great client experiences today.


This article nails the hygiene bit. I run a small shop and the Oster blade wash + regular disinfecting saved me from so many headaches. A few notes from experience:
– Get the Large Multipurpose Barber Station Organizer Tray to keep everything separated (clean vs dirty).
– Don’t skip daily clipper blade oils and weekly deep dips.
Oh and anyone else think the Luxury Double-Edge Safety Razor Shaving Kit is weirdly satisfying to use? Feels old-school but classy.
Really want to try that safety razor kit but a little nervous about cutting myself 😅 Any recs for first-timers?
Totally — organizer trays make workflow so much smoother. And the safety razor is often overlooked but customers notice the finish.
Agree on the organizer tray. I color-code my station and clients comment on how neat it looks. Also, safety razors = less irritation for many clients if used correctly.
Start with light angle, short strokes, and a good brush + lather. Takes practice but worth it.
Quick rant: why do some people think skipping maintenance is fine? You can buy the fanciest clipper but if you don’t clean blades, it turns into a paperweight. 😂
Also, shoutout to the article for encouraging building gradually. Hate those ‘buy everything at once’ lists.
P.S. The Professional 6.5-inch thinning shears are not for the faint-hearted — learn technique first.
Haha Marcus — the ‘buy everything at once’ trap is real. Slow and steady wins the kit race.
Preach, Marcus. Maintenance is the unsung hero of pro tools.
Couldn’t agree more. I ignored oiling once and paid for it with noisy, grinding clippers.
Great breakdown — I especially liked the part about building the kit gradually. I started with a cheap clipper and a pair of shears and it was chaos. Now I’m saving for the Precision T-Blade Cordless trimmer mentioned here.
Question for anyone: does that T-blade hold up for detailed necklines after a few months, or should I pair it with a separate detailer?
Good question, Maya — the Precision T-Blade is solid for necklines but if you do a lot of skin fades or extremely tight detailing, pairing it with a dedicated detailer can speed things up and reduce wear on the main trimmer.
Agree with Ethan. Also grab the Oster 18oz Blade Wash Cleaner liquid dip — it’s a game changer for prolonging blade life.
I use the T-blade daily and it’s been great for about a year. I do replace the blades seasonally and keep it oiled. For super tight lines I still pull out a dedicated foil detailer sometimes.
The Accessories and Storage section was my favorite — small things like a good blow-dry brush (Large Round Metal Barrel) and a tidy tray change the whole vibe of a station.
Minor gripe: the article could’ve included price ranges for each recommended item. Not everyone can drop big $$ at once.
Totally — I split my purchases across months. Start with clippers and basic shears, then add accessories like the blow-dry brush and organizer later.
Valid point, Sofia. We tried to keep it product-focused but adding price tiers (starter, mid, pro) is a good idea for a follow-up.
If it helps: the 10-piece scissors kit is usually budget-friendly, and you can swap in pro shears later. Build gradually, like the article says.
Short and sweet: 10/10 for stressing maintenance. Nobody wants dull shears or rusty blades. Two quick additions from me: always keep a microfiber cloth handy and label your dip jars (clean vs used). Saves so much time.
Also, is anyone else still debating between buying the Professional 10-Piece Hair Cutting Scissors Kit vs investing in a single high-end shear first?
I went kit-first (rookie mistake?) but it let me practice different styles without breaking the bank. Your mileage may vary.
Both routes work. Kits are great for variety and learning; a single high-end shear can improve your signature cuts. Think about what styles you do most and choose accordingly.
If I had to pick one: high-end shear first — you’ll feel the difference and build technique faster. Then fill gaps with a kit.
Loved the shears section. The Professional 6.5-inch Hair Thinning Texturizing Shears are honestly underrated. I got mine after reading this and they made a huge difference with layered cuts.
Also, pro tip: don’t use thinning shears on wet hair if you’re trying to keep texture — learned that the hard way lol 😂
Thanks for the tip, Liam. Good point about wet vs dry for texturizing — the article aimed to underline technique as much as tools.
Haha yes, lesson learned. Wet hair + thinning shears = surprise choppy layers. Dry for texture, wet for blunt control.
Long comment incoming — sorry not sorry 😅
I appreciate the article calling out sanitization like a main section. Running past clients without proper cleaning is just a bad look and, honestly, a liability. A few thoughts from a busy freelance barber:
1) Oster 18oz Blade Wash Cleaner — use it regularly but pair it with a good ultrasonic for tiny parts.
2) The Large Multipurpose Barber Station Organizer Tray is great, but get one with removable compartments. Makes disinfecting easier.
3) Shaving kits: the Luxury Double-Edge Safety Razor is lovely but teach clients how to maintain stubble between cuts.
One tiny critique: the combs/brushes section felt a bit light on brand recs — would’ve liked a couple more specific picks for detangling vs styling brushes.
On the brand recs: I use that Large Round Metal Barrel for volume and a separate wide-tooth for wet detangling. Works well.
Great detailed input, Nora — love the ultrasonic + blade wash combo tip. We’ll consider expanding the comb/brush recommendations in an update.
Yes to removable compartments. Saved my life during the last deep clean day 😂