
Why the Temple Fade and Precision Edging Matter
The temple fade frames the face and upgrades any haircut—small lines, big impact. Precise edging defines shape, improves symmetry, and makes a style read as professional. Barbers, stylists, and DIY groomers all benefit from mastering these techniques to create crisp, lasting results.
This guide delivers practical, step-by-step instruction: anatomy and growth patterns, tools and ergonomics, a clear fade workflow, trimmer and razor edging, symmetry checks and troubleshooting, plus advanced variations and maintenance plans to keep edges sharp between appointments.
You’ll find photos, pro tips, and quick troubleshooting checks to handle cowlicks, uneven fades, and edge migration. Follow the workflow and practice the trimmer and razor moves to build speed and confidence for consistently sharp, salon-quality finishes and client satisfaction, fast.


Understanding the Temple Area: Anatomy, Growth Patterns, and Face Shape
Anatomy of the temple zone
The temple zone includes the hairline above the ear, the temporal muscle area, sideburn attachment, and the point where scalp hair meets facial hair. Key landmarks to note: the temporal ridge (bone), the top of the ear, and the mastoid area behind the ear. These fixed points determine where edges sit and how a fade will read against a skull shape.
Assessing growth direction and cowlicks
Quick questions to ask or check:
Common tip: a cowlick at the temple often requires a slightly higher fade-start or a softer curved edge to avoid visible stepping as hair grows out.
Quick palpation and visual checks
Run your fingers along the temple ridge to feel the bone and note where hair transitions from scalp to finer temple hair. Visually, view the client from 3–4 feet away and tilt their head—this reveals inconsistent growth patterns and natural fall. Use a comb as a flat plane to expose subtle direction changes.
Mapping the ideal edge line to face shape
Practical how-to: mark a guideline with a clipper-over-comb or a light pencil line following the temporal ridge, then step back to check balance. A small anecdote: I once raised a fade 1/4″ on a round-faced client and the whole cut appeared slimmer—small shifts matter.
Next, we’ll translate these observations into the right tools and ergonomic setup so your edges stay steady and repeatable.
Tools, Setup, and Ergonomics for Clean Edges
Essential tools and when to use them
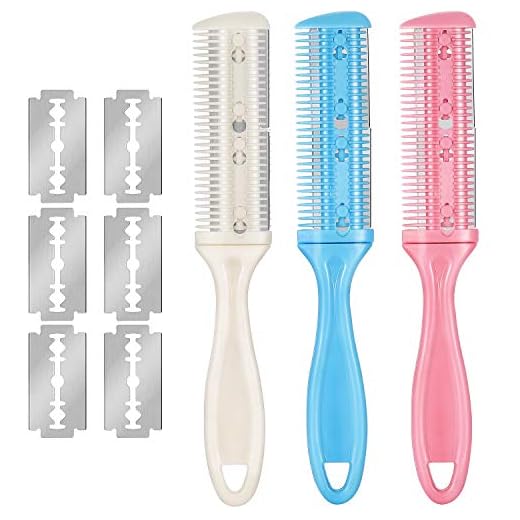
For crisp temple work you’ll want: clippers (Andis Master, Wahl Senior), foil and rotary trimmers (BaBylissPRO foil shavers; Andis T-Outliner or Wahl Detailer), detailers, a barber razor system (Feather Artist Club SS) with single-edge blades (Feather Artist Club SE), combs, blending guards, neck brushes, and strong directional lighting. Clippers and taper levers set the foundation; trimmers and razors finish the lines. Tip: choose foil for ultra-close, flat planes and rotary/detailers for curved, contoured areas.
Blade sizes and practical effects
Blade care in a minute
Ergonomics and positioning
Quick workstation checklist
Safety reminder: always stretch skin taut for razor work, take short controlled strokes, avoid inflamed skin, and ask about blade allergies before using new products.
Step-by-Step Temple Fade Workflow: From Baseline to Blend
Consultation & setting the fade height
Start by confirming with the client: how high do they want the fade (low, mid, high), and how sharp should the temple edge be. Use your finger or a comb as a vertical reference from the top of the ear to the corner of the eyebrow to mark the general zone. Agree on visible length above the temple—this small negotiation saves rework.
Establish the baseline: hard or soft line
Decide if the client wants a hard, graphic line or a softer taper. For a hard baseline, use a trimmer to define a clean edge; for a softer start, create a narrow clipper-over-comb zone that reads blended at first glance. Establish the line evenly on both sides before moving on.
Sectioning and graduated guard changes
Section hair away from the temple so you only work the fade zone. Work in small guard increments—down or up one size at a time—with overlaps to avoid steps. A common progression: 3 → 2 → 1 → 0.5 (or lever adjustments) while maintaining consistent stroke length and angle.
Blending techniques and rhythm
Blend from longest to shortest, pulling hair outward with a comb and scissoring-over-comb where the clipper texture looks too blunt. Use the clipper lever to soften transitions; slow, feathering strokes avoid gouges. Check symmetry by comparing reference points—top of ear, sideburn junction, and temple apex—rather than guessing by eye.
Preserve and refine the temple edge
Protect the established edge by trimming around it after each major blend pass rather than only at the end. Test frequently with a comb and mirror; imagine the edge as a “no-bury” zone—if blending threatens it, back off and re-define with the trimmer. Keep a steady rhythm: cut, check, refine.
Next: we’ll dig into the micro-movements and tool choices that make razor-sharp edges actually hold up in walking-out photos and daily wear.
Precision Edging: Trimmer and Razor Techniques for Sharp Lines
Skin prep: the non-glam step that matters
Clean, hydrated skin is your safety net. Start with a gentle cleanser, warm water to open pores, a light pre-shave oil (grapeseed or jojoba), then a thin layer of shaving cream or gel where you’ll use a blade. I once watched a veteran clipper artist stop mid-cut to re-wash a client’s temple—saved a nick and a reputation.
Trimmer: establishing the guide line
Use a detail trimmer (Wahl Detailer, Andis T-Outliner, or Panasonic ER-GP80) to lay the primary line. Key mechanics:
Do one clean pass per side, then step back and compare before moving to blades.
Razor: refining, feathering, and control
Switch to a sharp straight razor or single-blade disposable. Set a 30° blade-to-skin angle; use short, controlled strokes (3–5 mm) and stretch the skin with your free hand. Feather the final millimeter of the line by light, almost dry passes—this softens the transition so the edge reads natural on camera.
Avoid over-cutting by stopping when the line reads 90% done; re-check after the client sits up and moves.
Specialized moves: step-line, tapering, texturizing
Aftercare & client guidance
Apply antiseptic then a calming balm (aloe + witch hazel). Warn clients about 24–48 hour sensitivity, avoid hot showers and heavy workouts for a day, and schedule a 1–2 week tidy to keep edges crisp.
Symmetry, Detail Checks, and Troubleshooting Common Issues
Quick symmetry checklist
Use a repeatable routine to catch errors before the client stands:

Corrective techniques for common problems
Uneven height: re-establish the baseline on the lower side—use a longer guard (or comb) to match the higher side, then lower both sides stepwise.
Wavy lines: set a clean guide (single, slow pass with trimmer), then clipper-over-comb to smooth peaks. Short, controlled strokes erase waves faster than long sweeps.
Excessive taper: if too thin, back off with a higher guard and rebuild weight; if too heavy, soften edges with shallow razor feathering.
Burned or jagged edge: stop, hydrate the skin, then rebuild the line from a fresh baseline—work from the natural hairline outward, not inward.
Fixes for cowlicks and thin growth
For cowlicks: dampen and blow-dry into position, then texturize adjacent hair to blend direction changes. For thin zones: reduce contrast—keep slightly more length and use feathered blade work so patches don’t read stark.
Steady-hand drills and DIY checks
Remote/photo strategies
Take straight-on and 45° photos with consistent lighting; use a grid overlay app to compare symmetry. For DIY fixes, mirror-reverse your reference photo so you’re matching what you’ll see in the mirror.
Next, we’ll apply these fixes into creative variations and maintenance routines so crisp edges last between appointments.
Advanced Variations, Styling Integration, and Maintenance Plans
Creative uses of precise temple edging
Precision temple lines elevate many looks: disconnected fades read sharper with a clean temple break; hard parts pop when edged crisply; etched temple designs become micro-signatures. For seamless beard or sideburn transitions, map a single guiding line from temple to beard and work bilaterally—this keeps weight and shadow consistent. Anecdote: many barbers report clients noticing “edge freshness” before the rest of the cut—that small, sharp contrast sells the whole style.
Product choices to support visibility and hold
Choose products that enhance definition without making hair stiff.
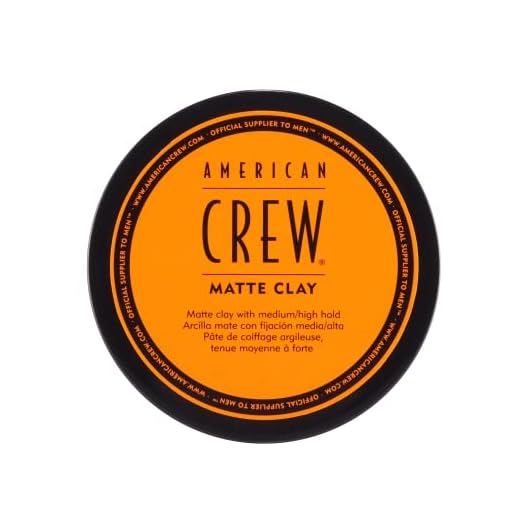
Good comparisons: Baxter of California Clay Pomade vs Layrite Cement for hold; American Crew Matte Clay for everyday texture. Use a pea-sized amount warmed between fingers and apply sparingly around the temple to accentuate the line.
Maintenance schedules and home-care tips
Safe at-home touch-up routine
Recommend a pro retouch when the design needs re-mapping, >50% blend loss, or if the client wants new variations. Start practicing advanced variations on mannequins, sketch designs with washable chalk, and introduce a “temple-detail” add-on service to build skill and revenue.
Next, we’ll bring these techniques together in the article’s final summary on consistent crispness.
Bringing It Together: Consistent Crispness
Preparation, tool mastery, and a methodical approach are the backbone of precise temple edges. Spend time assessing temple anatomy and growth direction, set up ergonomically, and maintain sharp blades and calibrated guards. A reliable baseline, measured passes, and deliberate blending produce repeatable crispness; slow, intentional work beats rushed fixes every time.
Make regular practice and clear client communication part of your routine—confirm desired edge height, sharpness, and maintenance intervals. Troubleshoot asymmetry promptly and experiment with subtle variations to develop signature finishes. Keep a short maintenance plan for clients and revisit techniques often. Commit to consistency, and the temple fade will become a dependable skill that elevates every service. Practice daily, stay curious, and enjoy refining.


Liked the troubleshooting common issues section. Saved me from over-fading a client last month — the shadowing fix worked like a charm.
Awesome — glad the shadowing tip helped. Shadowing is often just about re-checking your clipper angles and blending in shorter, controlled strokes.
Question from a newbie: For someone starting at home, what’s the best starter combo from the listed products? I’m torn between Wahl Color Pro + Wahl Lithium-Ion Pro or buying VGR 906 for detailing and Wahl for everything else. Also, are the Maitys thinning combs okay for someone who’s never used a razor comb before? Any beginner mistakes to avoid?
Would be great to have a simple ‘starter kit’ suggestion in the article.
I’d add: practice on a mannequin head if you can. Saves friendships 😂 Also, don’t fully zero-gap your trimmer until you’re confident — small increments.
Agree with the admin — Wahl + VGR is a solid combo. And yes, the Maitys set is very forgiving for newbies; just don’t yank the blade through tangled hair.
Good question, Hannah. For home starters I’d recommend: Wahl Color Pro for guard-driven bulk work + VGR 906 for detailing if you want crisp lines. The Wahl Lithium-Ion Pro is a great all-in-one if you prefer one tool. Maitys combs are fine for beginners — go slow and practice on lower density hair first. Biggest beginner mistakes: rushing the baseline, over-trimming symmetry, and not checking from multiple angles.
Solid article but a couple of constructive notes:
1) Could use more pictures or diagrams for the baseline stages — some of my junior colleagues still get confused about the first guideline line.
2) A quick comparison table of the listed products (VGR vs FADEKING vs Wahl vs Novah) would be clutch for readers deciding what to buy.
Loved the maintenance plans section though — pro-level stuff. Also, shoutout to the hairstyle integration tips with American Crew Matte Clay — simple but effective styling after the fade.
Bonus: American Crew Matte Clay old version holds differently than the new — worth a quick mention when pairing with sharp fades.
Thanks Priya — great feedback. We’ll consider adding visual diagrams and a product comparison in an update.
Agree. For those on a budget, Wahl Color Pro is a starter favorite; FADEKING and Novah are more pro-oriented imo.
Yes on the product table — some of those Amazon options overlap a lot and a quick pros/cons list would save newbies a bunch.
Short note: The ergonomics and setup tips are underrated. Adjust your chair height and wrist angle — saved my forearm last month. Also, clay + temple fades = dreamy texture.
Pro tip: don’t forget to charge your Wahl Lithium-Ion Pro the night before an all-day booking.
Amen to charging — battery failure mid-job is the worst. Glad the ergonomics helped your forearm!
Seconding the wrist angle advice. I tape a small grid on my station to remind myself of hand positions when tired 😅
Great article — compact and practical. The ergonomics section should be pinned in every barber shop. Quick thumbs up for the Wahl Lithium-Ion Pro recommendation for home users who want something reliable.
If anyone tells you temple fades are ‘easy’, they’re either lying or very brave 😆. The article is honest though — step-by-step makes it less scary. Also the humor in the ‘consistent crispness’ wrap-up gave me a chuckle.
Long one — sorry not sorry 😂
I’m a part-time barber and full-time perfectionist. Tried this exact temple fade flow last weekend and finally got a crisp baseline without overdoing the blend. The precision edging with trimmer + razor section is gold. I used the VGR 906 for the outline and then finished with a straight razor; the Maitys thinning comb made the transition super natural on a client with thick cowlicks.
Couple of extra tips from my end:
– When you set your baseline, lean the head slightly away (not flat) to avoid cutting into the natural hairline.
– Use the Wahl Color Pro for quick guard changes during the blend if you don’t want to keep switching clippers.
– FADEKING’s LCD case is actually handy for travel — clippers stay protected and you can check battery at a glance.
Anyone else mix clippers in the same job? I swear by mixing the Novah clippers for body with a smaller detail trimmer for temples.
Totally — I use Novah for overall bulk too. Also, if you’re traveling, the FADEKING case saved me once when TSA almost confiscated my clippers (lol).
Wait — TSA and clippers? 😂 Never thought of that. Good to know.
Love the extra tips — especially the head tilt note. Mixing clippers is common and smart: big motors for bulk, smaller trimmers for detail.
That baseline head tilt advice is going into my routine today. Thanks for writing it out!
I mix tools too. Pro tip: color-code your guard combs (Wahl Color Pro helps) so you don’t accidentally jump sizes mid-blend.
On the cowlicks note: take weight out with thinning comb BEFORE you start the blend if the growth patterns are chaotic. Saves time.
Really appreciated the symmetry and detail checks — those little 45° head turns and distance checks make a HUGE difference.
Also, the article’s coverage of trimmer vs razor techniques for sharp lines was practical. I switched from always using a razor to using the VGR 906 for most outlines now; only breaking out the blade for super-skinny lines.
Tried the Novah Professional Cordless Barber Clippers Kit for a week — very solid for bulk work. The only gripe is the plastic guard feel; nothing a little scotch tape can’t fix 😂
If you want sturdier guards, look into aftermarket metal guard systems — more investment but worth it for heavy use.
Novah + VGR combo sounds like my dream kit. Might try it next month.
I laughed at the guard tape — totally relatable. Novah’s motor is sweet though.
Curious — how long does Novah battery last under heavy use? Planning for weekend appointments.
Great to hear you’ve switched to a workflow that works for you. Love the practical fixes — scotch tape hacks are barber life.
Fantastic breakdown — loved the step-by-step temple fade workflow. The notes on face shape + growth patterns were super helpful for clients who want different taper shapes.
I tried the VGR 906 Zero-Gap trimmer after reading this and the zero-gap precision made lining up the temple sooo much easier. Quick question: anyone else notice a slight tug on coarser hair with the VGR at higher speeds? Thinking of pairing it with the Maitys 3-Piece Razor Thinning Comb for cleanup.
Also huge yes to the symmetry checks section — mirrors at 45° saved my afternoon 😂
Agree about the mirrors. Also, if tugging persists, check blade alignment — even brand new units can be slightly off. VGR is great but needs a lil love.
Thanks Sarah — glad the workflow helped! For coarse hair I usually drop the trimmer speed and make shorter, controlled passes. Pairing with the Maitys thinning comb is smart for removing weight before final edging.
I get the tug too sometimes — lubricate the blade or go over with a light oil, plus slow passes. Or try the FADEKING clippers for a slightly different motor feel.