Fast Maintenance: Clean & Oil in Five Minutes
Learn a quick, safe routine to clean and oil your clippers in under five minutes to keep blades sharp, sanitary, and performing reliably for every haircut, every time starting now.
What You’ll Need
Effortless Clippers Cleaning: Quick, Pro Results
Step 1 — Prep Your Space and Unplug
Sixty seconds of prep makes the whole five-minute routine faster, safer, and more satisfying — seriously, don’t skip this.Start by preparing your workspace and clippers. Choose a well-lit, flat surface near a trash bin and lay down a towel or paper to catch hair. Gather your supplies so everything is at hand.
Have these ready:
Remove detachable guards and set them aside. Consult your manual and gently remove a removable blade assembly now; keep screws in a tray or magnetic dish. Work slowly to avoid dropping bits into lint, vents, or drains.
Always switch off and unplug corded clippers before touching blades or screws. Remove an easily detachable battery on cordless models. Wipe the exterior to remove loose hair and dirt before opening the blade area — this reduces contamination when you clean more deeply. This prep usually takes under sixty seconds; don’t skip it.
Step 2 — Remove and Brush the Blades
Think of brushing as a mini detox — remove clippings now and you’ll avoid heat, dulling, and motor strain later.Remove the blade or open the blade housing to expose the cutting surfaces. Many clippers have two screws; use the correct screwdriver and work on a soft towel to avoid losing parts.
Lift the blade assembly straight off and set screws aside in a small container or magnetic tray. Use a small brush or an old toothbrush to sweep both the fixed and moving blades, removing hair, dust, and built-up clippings trapped between the teeth.
Pay special attention to the rear pivot area and the clipper’s fans or vents where hair accumulates. If lint is compacted, tease it out with a toothpick or wooden skewer — small, gentle strokes work best.
Avoid using metal picks that could nick precision edges. For especially hairy jobs, use one short burst of compressed air from a safe distance to blow loose debris; wear safety glasses.
Take your time here — a thorough brush job prevents overheating and dulling and makes the oiling more effective downstream. If blades separate into multiple pieces, photograph the layout before reassembly and keep screws matched to their original positions for easy reference.
Step 3 — Clean with Alcohol or Blade Wash
Want truly clean blades? Solvent and a little elbow grease remove grease and germs much better than just brushing.Deep-clean blade surfaces with an appropriate solvent. Remove the blades and place only the removable metal parts into a small container with rubbing alcohol (70% isopropyl) or a commercial blade wash — never submerge the clipper body.
Swirl the blades gently for a few seconds to dissolve grease and trapped residue. Soak for up to one minute if gunk is stubborn, then agitate with your brush to lift buildup. Use a cotton swab dipped in alcohol to scrub tight crevices and the blade-mounting area on the clipper head (example: the tiny channels behind the cutting teeth).
Dry the blades completely after cleaning. Wipe with a lint-free cloth while rotating the blade to reach all teeth and screw holes. Blow-dry briefly on low heat or air-dry until no solvent remains — wet blades trap moisture and can corrode.
Follow sanitizer product directions if you service multiple people (observe contact time and rinse instructions). Avoid oily residues after alcohol cleaning; if blade wash leaves a film, rinse and re-dry before oiling.
Step 4 — Oil Blades Correctly
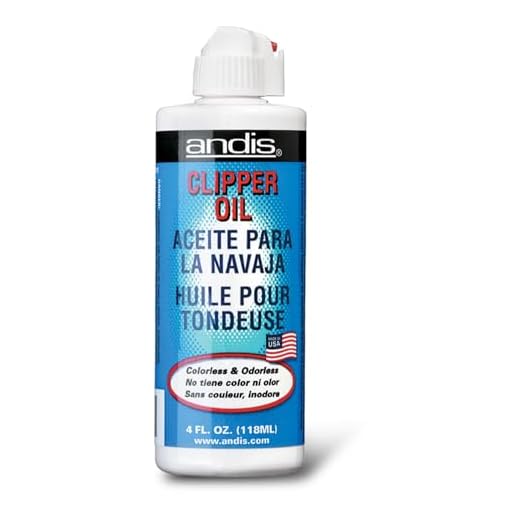
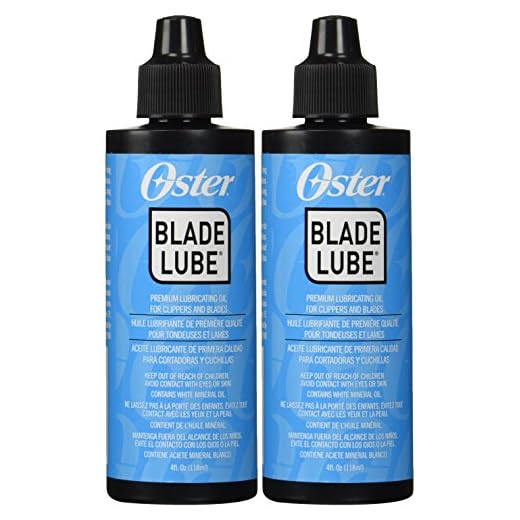
One drop between teeth is all you need — too much oil is worse than too little. Yes, really.Apply oil as the single most important step after cleaning. Use a purpose-made clipper oil or light machine oil—never use heavy oils or cooking oils that gum up and attract dust.
Place one drop between each pair of teeth along the top blade. Add a few drops along the blade’s moving edge and pivot points where metal slides on metal. If you removed the blades, add one drop on the shaft under the blade where it seats.
Avoid over-oiling. Wipe excess oil with a lint-free cloth so it doesn’t drip and collect dust. Run this quick checklist:
Reattach blades loosely at first, then tighten screws and run the clipper for a few seconds while holding it away from your face to evenly distribute oil and flush out debris. Expect smoother operation and less vibration. Oil before and after each client in a pro setting; oil every few uses or weekly at home. Keep a small labeled bottle near your clipper station.
Step 5 — Reassemble, Test, Wipe, and Store
A quick run and a tidy home for your clippers equals fewer surprises later — tested, tidy, and ready to go.Reassemble blades carefully, aligning mounting holes and matching screw lengths to their original positions. Tighten screws snugly—stop when plates sit flush; do not over-torque, which can warp blade plates.
Set blade adjustment screws to the manufacturer’s gap or to a setting that cuts cleanly without pulling (example: close enough that a single hair doesn’t snag). Reattach guards or combs and snap them into place so they sit straight and secure.
Plug in or reinstall the battery, then power on and run the clippers steadily for 10–20 seconds at the normal cutting angle. Listen and feel for smooth, consistent motion.
Wipe off any oil drips and fingerprints with a clean cloth. Store clippers in a dry, dust-free case or drawer away from humidity and direct sunlight. Keep the oil bottle and brush together so the whole five-minute routine stays fast and repeatable next time.
Quick Routine, Big Benefits
A quick five‑minute clean and oil routine prevents rust, extends blade life, improves cuts, repeat monthly or after heavy use to keep clippers reliable—ready to give it five minutes today?


Nice and simple — exactly what I needed. I usually rush through cleaning and end up with a noisy clipper. Followed Steps 1–4 and it actually took me under 5 minutes. Blade wash + a couple drops of oil = smoother run.
Quick tip: lay down a towel for Step 1 so you don’t lose screws or oil spills.
Totally agree about the towel. Saved me once when a screw went flying 😂
Thanks, Alex — glad it helped! The towel trick is a smart one; also helps catch the little hair clumps during brushing.
This guide saved me from a meltdown earlier. I do family trims and one of my clippers started tugging hair. Did Steps 2–4 and it was like a brand new tool again.
Also, pro tip: keep a small labeled bottle of clipper oil in your kit so you don’t mix it up with other oils. I once grabbed furniture oil by accident — never again 😂
Thanks for the simple, sane routine.
Glad it helped, Olivia — the furniture oil story made me chuckle. Labeling supplies is underrated but so effective.
OMG furniture oil?! That’s a horror story. Labeling saved me too.
Good guide but I wish there was a little more on deep-cleaning — like removing the blade completely to de-gunk inside. The five-minute routine is great for daily upkeep though.
Tip: when oiling, run the clipper for 5–10 seconds after applying oil. It spreads the oil evenly across the blades. The guide mentions that but worth repeating.
Great reinforcement — running briefly helps distribute oil and reduces spotting. Thanks for the tip, Leo.
Question: what kind of oil should I use? The guide says ‘oil blades correctly’ but I have a bottle labeled ‘clipper oil’ and one labeled ‘3-in-1’. Is clipper-specific oil worth the buy?
Clipper-specific oil is recommended because it’s lightweight and formulated for blades — it won’t gum up. 3-in-1 can work in a pinch, but over time it may attract debris more than dedicated clipper oil.
I use the brand my clippers came with. No drama, no weird smells.
If you’re on a budget, a drop or two of light sewing machine oil works too, but not WD-40 or heavy oils.
I’ve used clipper oil for years — cheap and lasts forever. Worth it imo.
Quick and to the point. Did it in 4:30 on my lunch break. 👌
Ha, my clippers were basically a tiny hair forest. Followed Step 2 with the brush and felt like I rescued a wild animal. Step 4 (oiling) was so satisfying — the hum changed instantly.
If you haven’t tried it yet, do it. Your clippers will thank you. 😉
Love the ‘tiny hair forest’ line! Glad the oil made a difference — a little goes a long way.
lol that mental image. Also, don’t over-oil — it attracts more gunk over time.
Neutral take: guide is concise and practical. Would’ve liked a tiny infographic for Step 3 (where to apply alcohol vs blade wash), but overall I appreciate that it’s time-efficient.
Thanks, Emily — good idea about the infographic. We’ll consider adding a simple visual to clarify Step 3.
Where do people store their clippers after cleaning? The guide says ‘store’ but I’m paranoid about moisture and dust. Any recommendations? 🤔
A dedicated hard case is worth it if you travel with clippers often.
I keep mine in a small zipper pouch with a silica packet. No rust so far.
Good question — store clippers in a dry case or drawer, ideally with the blades covered. Let blades dry completely before storage. Some folks use silica gel packs to keep moisture low.
Okay real talk — I tried this guide between clients and it actually works. Was worried about using alcohol on the blades but the section explains it well.
Also: small pet peeve — when they say “unplug” I wanna scream because ppl still clean while plugged in? wild. 😅
Will start doing this every week instead of once a month.
If you’re using alcohol, let the blades dry fully before oiling — that was my rookie mistake.
Same! I used to clean when plugged (yikes) until a friend pointed it out. Weekly is ideal if you use clippers often.
Appreciate the feedback, Sarah. We emphasized unplugging because safety first — plus it prevents accidental starts while you’re cleaning.
Helpful but slightly preachy about the ‘under 5 minutes’ — I find if you actually want them thoroughly cleaned you need 10–15 mins. This is a maintenance routine, not a full overhaul.
Still, the guide nails the routine for keeping blades happy between deep cleans.
Exactly — deep clean and sterilize occasionally, but this is perfect for frequent upkeep.
Thanks Marcus — that’s a fair point. We intended this as a quick maintenance routine; we’ll clarify that deep cleans need more time.
Long post because I took notes while doing it. Hope this helps someone:
1) Unplug and wipe off big clumps on a paper towel.
2) Remove the blade screws carefully — put them in a small dish.
3) Brush out hair, then dip blade in alcohol/blade wash for a few secs.
4) Let air dry, then 1-2 drops along the top and run for 10 sec.
5) Reassemble and test on a towel before using.
I used to damage blades by skipping drying. This guide fixed that problem for me. Also, keep a small brush dedicated just for clippers so you don’t mix it with other tools.
Excellent, detailed rundown — thanks for sharing your step list, John. The dedicated brush recommendation is a solid hygiene tip.
Do you remove the whole blade every time or just brush? Curious since they mentioned removing in Step 2.
Saved your steps to my phone — very clear!
Putting screws in a dish = genius. Never lost one since I started doing that.
Agree on the drying part. Alcohol evaporates fast but you can still trap moisture if you’re impatient.