Tame the Twist: Scissor-Over-Comb to Fix Cowlicks
Quickly learn a simple, professional technique to control stubborn cowlicks using sectioning and scissor-over-comb. This guide shows step-by-step methods to produce predictable, clean results that are easy to maintain and teach clients at home with minimal tools required for stylists.
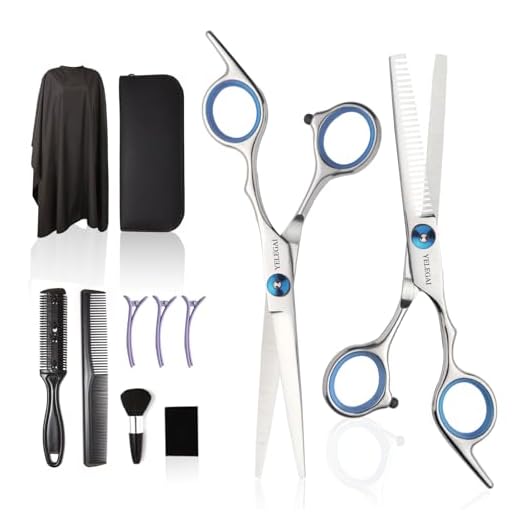
What You’ll Need

Evaluate Growth Direction and Cowlick Behavior
One minute of detective work—why this makes the rest effortless.Start dry: observe where the hair naturally wants to go. Stand behind the client (or use a mirror) and watch the grain — crown spirals, front hairlines that flip, or nape pieces that stick up.
Feel and test hair with your fingers or a tail comb. Note differences when you dampen a small section: some cowlicks lie down when wet, others spring back.
Mark anchor points with clips or a washable chalk dot — those are the spots that resist direction change and need routing or weight removal during cutting.

Section Smart: Create Manageable Working Panels
Less chaos, more control—neat sections are the secret to precision.Divide the haircut into clear panels around the cowlick: top, crown, and sides as needed. Use sectioning clips to isolate each panel and work from the most rebellious zone outward.
Key panels to establish:
Keep panels small near the cowlick to avoid overcutting and to allow targeted scissor-over-comb work. Clip surrounding hair completely out of the way and leave a ½–1 inch perimeter of hair to act as a guide. Create a tiny 1–2 inch circular panel for a stubborn crown cowlick and cut that area first, then release adjacent panels to blend.

Set Comb Angle, Elevation, and Tension
A small tilt, big payoff—angle and tension decide the result.Hold the comb so the teeth follow the exit direction you want the hair to take. Place your index and middle fingers beneath the comb to lift and control the hair, and apply steady, even tension—avoid jerky pulls.
Keep elevation low when working the cowlick; hold the comb nearly flat to the scalp to preserve weight and coax the hair to lie. Change elevation upward to remove bulk or soften the anchor.
Use slight overdirection—guide hair a few degrees off its natural exit toward the desired lay before scissoring-over-comb.
Quick settings to remember:
Try this example: for a crown whorl, overdirect forward 10–20° at low elevation while cutting.

Execute Scissor-Over-Comb Strokes Safely and Effectively
Stop hacking and start blending—learn the strokes that look professional.Use short, controlled cutting strokes with the scissors gliding over the comb’s spine, not the teeth. Keep the comb close to the scalp for precision and rest your guide fingers under the comb to maintain length and tension. Work slowly and remove small amounts—think 1/8″–1/4″ per pass.
Check symmetry frequently by stepping back and comparing sides. Protect the scalp by keeping scissors parallel to the comb; never angle the points toward skin. When you meet a stubborn cowlick, cut a few shallow passes while overdirecting slightly until the hair relaxes.
Key reminders:
Practice on a small panel first to build confidence before tackling the whole cowlick.
Redirect and Soften: Shorten Anchors, Add Guiding Layers
Think sculptor: remove resistant bits without losing natural flow.Shorten stubborn anchor points by taking tiny amounts at the root—think 1/8″–1/4″ per pass—so the hair loses the mechanical spring that feeds the cowlick. Create low-weight guiding layers just below the anchor with scissor-over-comb, keeping elevation low (0°–30°) so guides sit naturally.
Overdirect those guides into the surrounding hair and blend with diagonal, feathering strokes so the new fall masks the cowlick. Favor subtle weight removal rather than aggressive thinning; this preserves texture and prevents frizz.
For example, on a crown cowlick, shorten the root slightly and overdirect the next 1–2 layers toward the back to let gravity help.

Dry-Test, Refine, and Teach the Hair
The dry check is the truth—why wet looks can lie and small tweaks matter.Blow-dry the hair in the intended direction and reassess the cowlick. Use a nozzle and medium heat; brush or comb the section into place and watch for stubborn spots.
Make tiny corrective snips where the cowlick still shows. Work in 1/16″–1/8″ micro-passes with scissor-over-comb, recheck after each pass so you don’t overcut.
Style with a light product and a targeted blast of heat to train the hair. Apply a pea-size of styling cream or light paste, then use a round brush and 5–10 seconds of focused hot air to set the direction—repeat daily for several days (for a crown cowlick, aim the blast backward to encourage lay).

Finish: Simple, Repeatable, Maintainable
With clear sectioning and careful scissor-over-comb work you can reliably control cowlicks; keep sessions small, check dry, teach hair with styling, then try it, share photos, and join the conversation.


Neutral take: useful for pros but a bit dense for newbies. Maybe add a quick ‘beginner’s cheat-sheet’ with three must-do moves? Right now I skimmed and still felt lost at step 4.
Great feedback. A 3-move cheat-sheet is a solid idea: 1) Section to see growth, 2) Use comb angle + 1/4″ elevation + gentle tension, 3) Dry-test and refine. We’ll add it.
Yep, a one-page checklist would help. Even an index card with ‘comb angle, elevation, tension’ scribbled would get me started.
Long-winded but useful — sharing my full process because some of you asked for specifics:
1) I always start by mapping growth direction with a dry comb. 2) Section into narrow panels, clip the rest. 3) Use a 30-degree comb angle, 1/4″ elevation for crown cowlicks. 4) Scissor-over-comb in short, overlapping strokes. 5) Dry-test, then soften anchors by point-cutting if needed.
Hope that helps y’all. Took me years to get this routine down, lol.
Thanks — super clear. I’m saving this comment and will try it next weekend.
That 30-degree tip is gold — I messed up before using too steep an angle. Saved me time.
Would you mind saying what scissors you use? Brand/length? Trying to decide what to buy 😅
This is exactly the kind of practical rundown we wanted more of — thanks for sharing the step-by-step, Priya. Super helpful for others trying it at home.
I loved the safety tips in step 4. For anyone cutting at home: go slow and keep your fingers visible between comb teeth. Almost nicked myself trying to multitask and regret is real 🙈
Oof — glad you’re okay. Visibility is everything. Also keep scissors closed while you reposition and only open when making the snip.
Pro tip: put a tiny piece of tape on your scissors’ finger rest to remind you where your thumb sits. Weirdly helps me keep control.
Loved the ‘Finish: Simple, Repeatable, Maintainable’ — felt like a mantra. Quick note: for very curly hair textures, does this method need major adjustments? I tried it and my curls poofed weirdly.
If curls poof, try removing weight from underneath instead of chopping the top layers. Helps the shape without losing definition.
Curly hair is a different beast. Lower elevation and less tension usually work better to avoid disrupting the curl pattern. Consider cutting curls dry when you can so you see their natural spring.
Yep — cutting curls dry and in their natural state is gold. Also use the scissor-over-comb more for shaping than removing big weight on curls.
Ha, tiny rant: why do cowlicks exist to ruin my mornings? On a serious note, the guide helped me understand redirecting vs cutting. Redirecting felt weird at first but less ‘choppy’ than just hacking it off.
Same — the ‘guiding layers’ trick is magic for blend without losing volume.
Redirecting is underrated. I used to over-cut and ended up with an obnoxious wedge. Now I only shorten anchors and add guiding layers.
They’re nature’s little rebels. Redirecting keeps movement and avoids blunt weight that draws attention. Less choppy, more intentional.
Tried the scissor-over-comb method last week on my own bangs — wonky at first but after following the comb elevation tips it looked way better. My one gripe: the sectioning diagrams would help. 😅
Thanks Mateo — noted. We’ll add step-by-step diagrams for sectioning in the next update. In the meantime, think about dividing the area into small vertical panels about 1/2 inch wide for precision.
If you don’t have diagrams, tape markers on a mirror to visualize sections — dumb trick but it works when you’re solo.
Also consider using a handheld mirror for the back crown sections so you can see growth direction clearly.
For bangs, low elevation and a shallow comb angle helped me. Don’t go too steep or you’ll get layers where you don’t want them.
Lol, I used a sticky note once as a guide. Embarrassing but effective 😂
This line got me: ‘Set Comb Angle, Elevation, and Tension.’ Didn’t realize tension mattered that much — my arms hurt but it’s worth it. Anyone else feel like a tiny workout after a full head scissor-over-comb session?
Also try shorter scissor handles if you do this a lot; ergonomics make a huge difference.
Haha yes. My shoulders scream. Tip: stretch between sections and keep the elbow relaxed. Tension should be firm but not bone-crushing.
Tension = consistent control, not max force. Think of it as holding the hair like you’re holding a small rope — firm enough to guide, loose enough to move.
Constructive criticism: the guide assumes comb-over skills that many stylists might not have. Could use a short video or gif for ‘scissor-over-comb stroke’ — timing and distance between snips were hard to visualize from text alone.
Videos would be clutch. Even slow-motion snippets of the handwork would help so much.
If you can’t wait for video, try practicing with a wig head or on a willing friend using very small sections. Gets the muscle memory going.
Totally valid. We’re working on video supplements. Meanwhile: aim for smooth, overlapping strokes about 1/8 to 1/4 inch apart for a natural blend, and keep the comb moving slightly between snips.
Great guide — super practical. I especially liked the ‘dry-test, refine, and teach the hair’ step. Saved me from a handful of awkward haircuts. Quick question: when you say “shorten anchors,” how short are we talking for a stubborn cowlick at the crown?
Good question, Emma. For crown cowlicks I usually shorten anchors gradually — start with 1/4 to 1/2 inch reduction and test with the dry-check. If the cowlick still flips, take a little more in small increments rather than a big chop all at once.
Also depends on hair texture — finer hair might need less shortening, while thick coarse hair tolerates more. Always test between cuts!
Agreed — I trim a tiny bit, then blow-dry into place. If it holds, you’re golden. If not, repeat. No need to be brutal at first.
Funny thing — redirected a cowlick for my kid using the ‘anchor shortening’ method and it actually stuck through a rainstorm. Magic? nah, technique. Wanted to say thanks for the clear steps!
Do you mind sharing how much you shortened and where (crown vs frontal)? Curious re: small-scale adjustments.
Ha nice. Kids are the toughest critics — if it stays in place for school photos it’s a win.
That’s awesome to hear. Real-world test is the best compliment — especially if it survives weather!
Neutral: Solid technique list, but some of the lingo could be simplified for home-cutters. For example, ‘elevation’ could be explained as ‘how much you lift the hair from the head’ — small tweak that makes a big difference in clarity.
Agreed. Simple language helps when you’re trying to follow steps while doing the actual cut.
Great point. We’ll add plain-language parentheticals for technical terms. Thanks for the suggestion.
Short and silly: I tried ‘teaching the hair’ and now my cat insists on sitting on my head during blow-dries. Not sure if that’s progress but the cowlick is tamed 😸
Haha, same here but replace cat with toddler. ‘Teach the hair’ ends up being an educational moment for both.
LOL. The best salon assistants are furry. Also, kudos for keeping it light while learning technique 🙂
Cats and client rinse cycles — a classic salon hazard. Glad the hair behaved (and hope the cat enjoys the new styling station).