
Master the Taper Fade: Your 6-Step Roadmap
Want a clean, professional taper fade you can replicate or explain to your barber? CRAZY FACT: top barbers often finish fades in under five minutes. This six-step guide makes prep, guards, blending, shaping, finishing, and upkeep simple and repeatable today.
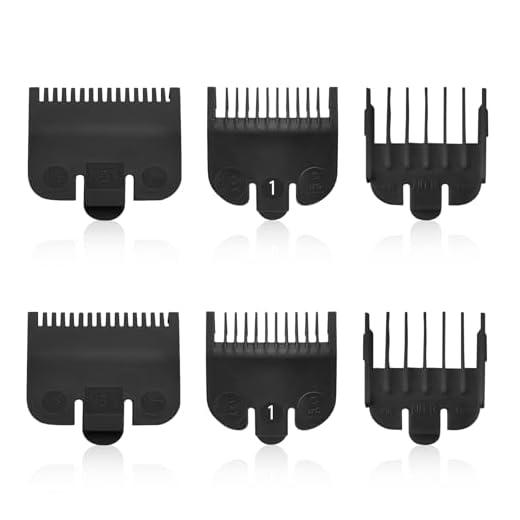
What You'll Need

Step 1 — Prep the Canvas
A great fade starts with the right shampoo and mindset — who knew washing matters this much?Start with clean, towel-dried hair; damp hair cuts more predictably than soaking wet.
Comb through to remove tangles and study the head shape and hair growth patterns (cowlicks, partings).
Position the client under good lighting and set a second mirror so you can check the fade from all angles.
Decide the fade height—low, mid, or high—before touching the clippers; this early decision prevents mid-cut indecision and saves correction time.
Example: if a stubborn cowlick sits at the crown, pick a slightly higher fade to blend it naturally instead of exposing a patch.

Step 2 — Choose Your Graduation: Guard Selection
Pick the clippers like a paintbrush — the wrong size ruins the picture.Map out your desired lengths: shorter guards at the nape and sides, longer ones on top. Visualize the bands before you cut.
Start with a longer guard than you think and work down if needed. This avoids accidental over-clipping and gives you room to refine.
Use a clear progression of guard sizes to create smooth steps. For example:
Mark transition zones visually with a comb or a light clipper line so you know which guard controls each band. Test a small patch first to see how the client’s hair density and your clipper speed affect the cut.

Step 3 — Create the Baseline
Set a clean guideline — it’s the scaffold that saves your fade.Create an initial guideline with a mid-length guard (for example, a #3 or #4). Hold the clipper flat and steady and move around the head at ear level and the nape to set where the shortest part will start. Think of it like drawing a horizon on a painting—this line keeps everything balanced.
Use small, controlled strokes and keep your wrist relaxed. Check the baseline in the mirror from both sides to confirm evenness.
If doing a drop fade, curve the baseline slightly behind the ear so the fade follows the skull’s natural shape.

Step 4 — Blend Like a Pro
Stop seeing lines — learn the rake, flick, and clipper-over-comb tricks that banish steps.Soften visible lines by working slowly and deliberately. Open and close the clipper lever to create intermediate lengths; for example, start with the lever fully open, then close it halfway and sweep the blade upward at an angle to feather the line.
Use half-guards and short, overlapping passes to blur transitions. Move the clipper at a slight tilt—never chop straight up—and keep your wrist relaxed.
Use clipper-over-comb for stubborn areas or textured hair: hold the comb at the desired blending angle, lift the hair that sticks out, and trim only the protruding tips with the clipper. Work in small sections, repeat passes, and vary lever position to match surrounding lengths.
Patience here prevents overcutting and gives that smooth, professional fade.
Step 5 — Detail and Edge
Edges make the difference — sharp lines or soft natural edges? Your call.Switch to your trimmer to define the hairline, around the ears, and the nape. Work slowly and keep the head steady.
Decide on a crisp lineup or a softer finish. For a crisp look, hold the trimmer perpendicular and cut deliberate, short lines at the temples; for a soft finish, use light, flicking strokes and blend into the surrounding hair.
For skin fades, carefully use a foil shaver or razor to remove remaining stubble. Stretch the skin, shave in short controlled passes, and rinse the blade often to avoid nicks — for example, ask the client to tilt their chin slightly forward to expose the nape.
Finish by brushing off clippings and refining any uneven spots with small touch-up strokes.

Step 6 — Texture and Finish
The final polish: style, product, and maintenance hacks that keep your fade fresh two weeks longer.Add texture to the top with point-cutting or thinning shears to avoid a blocky look. Use small snips into the ends at varying lengths—example: make 10–15 light point-cuts around the crown to remove weight. Keep scissors vertical for softer separation.
Apply a pea-sized amount of matte paste or light cream, warm between palms, and work through hair to complement the fade height. Style with fingers for a messy, modern finish or with a comb for a cleaner look.
Maintain the cut by touching up the neckline and edges after a week or two. Schedule full fades every 3–5 weeks depending on hair growth.
Practice these small refinements so the fade always looks intentional.

Go Cut — Confidently
Follow these six steps patiently, practice the blending motions, and you’ll consistently get clean taper fades; start simple, learn from each attempt, and share your results—give it a try now and post your progress to inspire others today, be bold.


Question: when they say “texture and finish” in Step 6, are they referring to point cutting only or also texturizing shears? I worry I’ll remove too much bulk.
I’ve ruined a fade before by over-texturizing — rookie move. Any red flags to watch for?
Good catch, Miguel. Step 6 covers both: light point cutting for surface texture + selective use of texturizing shears for bulk. Red flags: removing too much from the perimeter or overdoing weight removal near the hairline. Work slowly and check symmetry often.
Start small with texturizing shears — take a tiny bit, comb, and re-evaluate. It’s much easier to remove more later than to add hair back 😂.
I skimmed the steps and jumped straight to Step 4 because lol I hate long tutorials. Blending like a pro is still elusive tho.
Is it more about clippers or scissors-over-comb? I feel lost between the two techniques.
Short and sweet: this is the best 6-step fluff-free guide I’ve seen. Liked the sequence — Prep -> Baseline -> Blend -> Detail felt intuitive.
One little nit: maybe mention how to handle fades on curly hair specifically. The texture/finish step felt a bit geared to straight hair.
Good point, Ethan. Curly hair needs different guard choices and often more texturizing scissors work. We’ll expand Step 6 to include curly-specific tips soon.
Loved the tone — not too preachy. A couple of small things:
1) Step 1 — Prep the Canvas: would be nice to see recommended products (light sprays, leave-in creams) for different hair types.
2) Step 4 — Blend Like a Pro: I found the recommended clipper-over-comb motion a bit unclear without a visual. Maybe a GIF?
3) Humor: the ‘Go Cut — Confidently’ line made me snort. 😂
Also: anyone else find the transition between guard sizes janky at first? Took me 3 attempts to stop seeing a faint line.
Really appreciate the clarity though — made me brave enough to try a skin fade on my partner.
Thanks, Zara. Product recs and a GIF demo are solid suggestions — we’ll prioritise the visuals. For guard transitions: try stepping by half sizes where possible and use the lever on the clipper for smoother fades.
If your clipper has a taper lever, use it mid-blend instead of swapping guards too often. Makes transitions smoother.
I use a small handheld mirror to check the fade from different angles — helps spot faint lines before you finish.
Also, a light mist of water can help control stubborn curls when blending. Not soaking, just damp.
Nice breakdown — short and practical. Loved Step 2 about guard selection, that’s where I always mess up.
Quick tip from me: mark your clippers with a piece of tape so you don’t mix guards mid-cut (yes, been there 😅).
Also, Step 4 blending examples would be awesome with more pics or a clip-in demo.
Thanks for keeping it simple — gonna try this on my bro this weekend!
If you want, share a photo of the result after you try it on your bro — happy to give quick pointers.
Taping guards is genius. I once used the wrong guard and went from ‘cool fade’ to ‘oops’ in 10 seconds 😂.
Great tip about the tape, Maya — glad you found Step 2 useful. We’ll consider a short clip demo for blending in the next update.
This was surprisingly helpful — quick Q: for Step 2, any absolute guard numbers you recommend for a classic taper fade (not super short)? I’ve tried 1->2->3 and it looked patchy.
Also, love the no-nonsense style. A few typos in the PDF but nothing major 🙂
Agree with admin. I usually do 1.5 (lever down on a 2) to 3 for that smooth classic look.
If you want, tell us the hair thickness and desired length and we can suggest a specific guard map.
For a classic taper fade try starting at a 2 or 3 for the lowest part, then blend into a 4–6 on top depending on desired length. The exact numbers depend on hair density. Thanks for flagging typos — we’ll clean those up.
Okay real talk — I tried this on myself and, wow, Step 5 (Detail and Edge) is the part where my clumsy hands betray me.
The guide’s not sugarcoating the effort needed which I appreciate. The line work took forever but once I cleaned up the edges, the whole thing looked polished.
I’d love a troubleshooting list: common edge mistakes and quick fixes.
Also: do you recommend oiling the trimmer before every single cut? I sometimes skip it and then the clipper sounds sad. 😬
PS: a small section on cowlicks would be gold.
Edge work takes patience. Try resting your elbow on something steady to stop the shaky-hand problem. Also use a fresh blade for cleaner lines.
For cowlicks: go with the natural growth direction when cutting close, and when blending above it, use slightly shorter guards to avoid weird ridges.
Thanks for the honest feedback, Ava. Great idea — we’ll add a troubleshooting checklist and a short bit on cowlicks in the next revision. Yes, oiling the trimmer before a session is good practice (just a drop or two) to keep performance and avoid pulling.
Added a note about cowlicks to our suggestion list — thanks for the nudge!
If you want, tell us which trimmer model you’re using and we can suggest blade maintenance specifics.
This guide saved me a ton of trial-and-error. I used to get a harsh baseline every time (Step 3) — the ‘create the baseline then soften up’ approach actually works.
Couple of questions: what blade angle do you normally use when creating the baseline? And for very thick hair, should you go a guard up when starting the baseline or just slower strokes?
Not 100% perfect yet but way better than my first attempts. Cheers.
Agree with admin. Also try using a trimmer with a staggered blade if you have lots of density — it cuts heavy hair smoother when establishing the baseline.
Good to hear it helped, Liam. For the baseline: a slight angle (around 10–15°) helps avoid digging in. For very thick hair, starting one guard up or doing a dry trim to reduce bulk first both work — go slow and check frequently.