
Make Patchy Look Purposeful: Trim Smart, Not Despair
I know it’s frustrating when your beard has thin spots. This primer shows how to use trimmer settings, guard choices, blending, and texture to reshape patchy growth into a fuller, purposeful look — no fillers, just smart technique and patience.
What You’ll Need
Assess Your Patch Pattern First
Where are the gaps—avoid trimmer panic and target the problem like a pro.Stand in natural light and map your beard: note dense zones, thin spots, and growth direction. Take photos from the front and both sides so you can compare angles and avoid surprises.
Decide whether to shorten everything to reduce contrast or to preserve length where it helps cover gaps. Choose an overall shape—short boxed, stubble, or longer—based on your jawline and where the gaps sit. For example, if the chin is full but cheeks are sparse, favor slightly longer chin length to draw focus. Don’t rush: five minutes of thoughtful observation saves major mistakes.
Choose the Right Guard to Even Out Contrast
Shorter everywhere? Not always — here's why selective trimming beats a buzz-everything approach.Pick a guard that reduces contrast between thick and thin areas without making the whole beard disappear. Start with a longer guard than you think for heavy patchiness, then step down if needed.
Do a uniform pass at one setting to establish a baseline length; this evens denser patches and prevents sparse spots from looking extra thin. Check in natural light and from multiple angles between passes.
Keep notes of the guard used so you can replicate the look. Example: if cheeks are thin but chin is full, try an initial 8 mm pass, reassess, then shorten to 6 mm only if it improves overall balance. Remember: gradual reduction and visual checks beat one drastic cut.

Blend Strategically to Disguise Gaps
Think gradients, not cliffs—soft transitions trick the eye into seeing density.Switch guards after your baseline pass to create subtle gradients that mask sparse patches.
Use a longer guard on thin cheek zones and a shorter guard where hair is dense — for example, try 10 mm on cheeks and 6 mm on chin to compare balance.
Work with the grain for a uniform length.
Cross-check by trimming gently against the grain in short strokes to smooth transitions.
Use the trimmer without a guard only to define crisp cheek or neckline lines; avoid bare-skin contrast that highlights gaps.
Comb hair down and trim stray long hairs that draw attention to holes.
Use light, overlapping passes and frequently step back to check symmetry and how the blend reads from a distance.

Add Texture and Direction for Visual Density
A little angled chaos can make your beard look larger—science of texture over volume.Introduce texture by trimming at slight angles and varying stroke pressure to create deliberate, uneven lengths. Angle the trimmer 15–30° on light passes and lift slightly for shorter spots. Point-trim patchy areas with scissors or a no-guard trimmer so neighboring hairs can fall over gaps — snip single hairs, not whole clumps.
Train hairs toward gaps by combing and brushing downward and inward each morning; use a comb and a few firm strokes to set direction. Apply a pea-sized amount of matte beard balm to keep hairs matte and in place without shine.

Define Edges, But Don’t Overline
Sharp borders can make patches scream—soft edges look more natural and fuller.Keep cheek and neckline definitions natural rather than razor-straight. Soften the cheek line into a slight curve to reduce stark contrast between skin and hair and hide thin spots.
Use the trimmer at an intermediate guard (about 3–5 mm) and make upward, fading passes to taper cheeks and neck into the beard rather than cutting a hard edge. Avoid hard, single-stroke cuts that create a high-contrast border.
Finish with small scissor snips for stray hairs. Check your work in different light and at arm’s length. Let clean, natural edges support perceived density.

Maintain and Iterate for Lasting Results
This isn’t a one-time hack—consistency and small tweaks keep your beard looking engineered, not accidental.Establish a weekly trimming routine using the same guards and blending patterns you found successful. Photograph the beard periodically to monitor growth and adjust techniques as hair fills in or seasons change. Use beard oil and gentle exfoliation to improve hair health and visibility of follicles. If growth changes, revisit guard choices and blending approaches; sometimes letting certain areas grow longer while trimming neighboring zones works best. Finally, accept that patchy beards can become stylish with patience—iterative minor changes beat dramatic experiments.

Small Tools, Big Impact
Assess, choose guards, blend, texture, and upkeep—small adjustments make patchy beards look deliberately fuller. Try these steps, practice subtly, then share your before-and-after photos and styling tips, and tag us.


Not gonna lie, I tried the guide after reading it on my lunch break and got decent results in 20 mins.
The “Don’t Overline” advice is golden — tempted to draw a perfect outline but it ruins the natural look.
20 mins? Respect. I always take an hour and still stress lol.
Nice! Quick sessions often work best. Overlining tends to create an artificial shape that contradicts the ‘purposeful’ look.
Yeah the ‘natural edge’ is the hardest but most rewarding part.
This is solid. Only critique: the “Define Edges” section should have more details about necklines. I nearly cut too high cause I wasn’t sure where the guide meant.
Also tip: step back and look from eye level before final trimming. You can see if it’s too high/low.
Good feedback, Ethan. When in doubt, use the ‘two fingers above Adam’s apple’ guideline as a starting point, then adjust to the face shape. I’ll consider expanding that section in an update.
Yes! Neckline saved me once I found that two-fingers rule. Keeps it natural.
Love the humor in the guide — it made a technical topic feel approachable.
One nitpick: maybe add photos showing before/after for each step. Visuals would speed up learning for people who are visual.
Great suggestion, Grace. I’ll work on adding step-by-step photos in the next revision — before/after shots especially for the guard and blending steps.
Agree 100%. Pics = less guesswork.
This guide actually helped me more than I expected.
I always freaked out at the patchy parts and just shaved everything off.
Tried the guard trick to even out contrast and it made my chin look way fuller.
Tip: go slower than you think — blending takes time.
Thanks for the clear steps! 🙂
So glad it helped, Olivia! Slow and steady is the secret — especially when blending. If you want, tell me which guard number you used and I can suggest tweaks.
Totally this. I rushed once and ended up with one side shorter haha. Guard 2 saved me.
Nice!! What’s your daily maintenance like now? Do you trim every day or every few days?
Long post because I had many tries and wanted to share what actually worked for me:
1) Assessed my patch (cheek gap, sparse chin)
2) Used a longer guard on cheeks than chin to make the contrast smaller
3) Did subtle blending for 10 mins — yes, it takes that long
4) Defined the edges with a soft line; no harsh overlining
Now my beard looks intentional, not ‘I gave up’.
Also, small tools like a cheap comb and scissors were clutch. Don’t sleep on them.
I appreciate the details. How long did it take you to get comfortable with scissors around the mouth area? That’s my weak spot.
Awesome breakdown, Fiona — thanks for adding a step-by-step from your experience. The mention of scissors + comb is important; clippers alone don’t always give the control for those finishing touches.
This is exactly the kind of practical walk-through I was hoping for. Saved it!
I loved the bit about “Make Patchy Look Purposeful” — gives permission to stop obsessing 😂
One thing I added: take photos from different angles after trimming so you can see where light emphasizes gaps. Helps me adjust the next session.
Camera trick is gold. Also helps to track progress if you’re trying different guards over weeks.
Photos are a brilliant hack. Lighting does weird things to perception — seeing it on camera can reveal different problem spots than your mirror.
Short and sweet: blending is underrated.
I wasn’t convinced about ‘texture and direction’ until I actually combed hair and trimmed with the grain.
Little detail but big difference.
Yes — texture makes the gaps less obvious. I use a point-cutting motion with the trimmer to rough it up.
Great point, Marcus. The guide’s step 4 is about that exact point — creating micro-variations to catch light differently. It fools the eye into seeing more density.
Question: for guys with curly beards, do you recommend the same guard strategy? Curly hair sticks out more, so I’m not sure blending will look as smooth.
I’ve got curly hair — I used guard 3 on the cheeks and 2 on the chin. Brushing before trimming was a game-changer.
If it’s really curly, consider an oil or balm first so curls lay down. Makes the trimmer cut more consistently.
Good question, Daniel. Curly beards often respond well to slightly longer guard lengths to avoid a patchy buzzed look. Also, use a denser comb or a beard brush to align curls before trimming — that helps blending. You might need to rely more on direction/texture than on clipper fades.
Agreed. Also don’t try to over-blend — natural curl can hide a lot of unevenness if you keep it tidy.
A bit long, bear with me:
I used to avoid shaping my beard because I thought the gaps would be more obvious. This guide made me try the long-guard-on-cheeks trick and I was shocked.
Steps I added: do the guard test on clean, dry hair and mark the jawline lightly with a razor first.
Maintenance is everything — a quick 5-min trim every 3 days keeps it sharp.
Also, embrace the asymmetry; it’s less noticeable when the overall length is harmonious.
Great additions, Henry. The ‘guard test’ on dry hair is critical — wet hair can lie differently and mislead your choices.
Marking the jawline with a light razor helped me stop over-lining — saved my face more than once.
Embracing asymmetry = therapy 😂
Solid tip on trimming every few days. I try weekly and it gets wild fast.
Quick newbie question: when they say “blend strategically,” are they talking about using different guard lengths only, or also changing the angle of the trimmer? I’m confused.
Both. Blending combines guard length transitions with angle changes and small flicking motions. Use longer guards on higher areas, shorter below, then use the trimmer at a slight angle to soften the line between them.
Angle matters a lot. Tilt slightly and use short strokes where the lengths meet.
Funny but true — my partner thinks I look like a different person when I follow these steps. 😂
The small tools section convinced me to buy a precision trimmer; total 10/10 investment.
Would love a recommended tool list though (brands, budget picks).
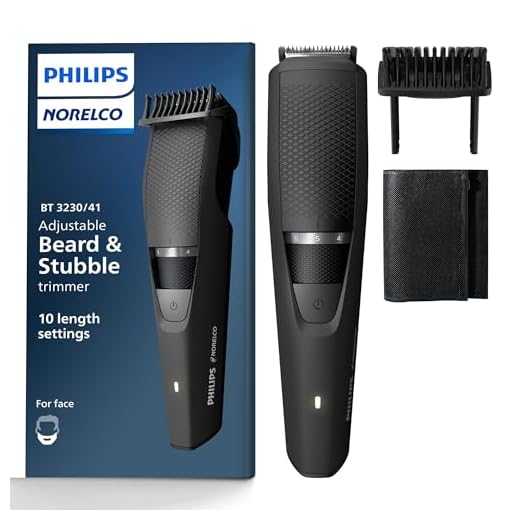
For budget, I like the Philips one; mid-range Wahl Magic Clip is great for blending.
Glad it made a difference! I’ll put together a short recommended tools list soon — covering budget, mid-range, and splurge options plus a few must-have accessories.